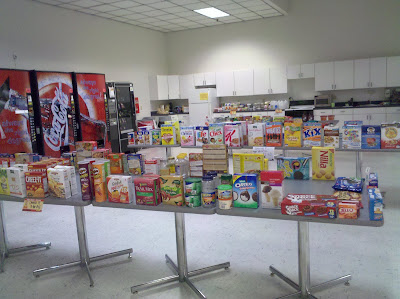
You can do this at home, too! Although I will say I collected 'garbage' in my cubicle for a few months to get it to fill an entire large cafeteria. You can do the same thing just on a smaller scale--maybe in your living room or basement!
Here's how to do it yourself:
1. Make a shopping list based on the item you have collected. I made them in Braille, large print and a picture list (below) for my non-reader students. You can also make a picture list for early childhood age students who are just learning how to recognize items. Make sure your pictures are clear, keep a cautious eye for background visual clutter.

2. Set up your grocery store. I set things up according to categories. I had a freezer section, dairy and aisles with similar items. I made sure that all the boxes & packages were in good condition. I taped down the flaps when needed. And I made rows & stacks just like in a regular grocery store.


3. I went to a local grocery store and asked for their signage so I could make sale labels throughout the store. I made sure they were in large print to make it easier for accessibility.

4. I also asked the local grocery store for old shopping baskets. As with everything in the grocery store, these are all real objects to teach about items.
Some items that are not pictured that I also had were:
-a checkout lane (I used a long table with plastic, paper & reusable bags). I was lucky enough to get a talking register to create a checkout lane.
-endcaps with endcap-type merchandise
-aisle signs. I made them on poster board with big black letters that said what was in each aisle and section
-cutsomer service desk. It was right at the entrance to the grocery store
-most important: grocery store workers!! A few of my teachers volunteered to help out with this module so they all wore aprons (which signified that they were workers) and were placed throughout the market. The students were able to access them if they needed help locating items. They also interacted with the workers at the customer service desk and checkout lanes.
Have fun creating your own grocery store or market. Before the students went to the market, we had an O&M mini-lesson about the grocery store. I will be posting O&M links with tips about mobility in another post.
Do it at home: Create your own grocery store or mini market! Collect all kinds of items that your child likes to eat (milk containers, egg cartons, cereal boxes, juice containers, etc.). Let your child explore them. If they have vision, let them tactually and visually check them out. After you have explored your home grocery store store, get out and explore a real store!

No comments :
Post a Comment