Showing posts with label Literacy. Show all posts

Saturday, December 19, 2020

Teach the Expanded Core Curriculum by Writing Letters to North Pole Friends

a graphic that has a big envelope that says Teach the ECC by writing to North Pole friends
Writing letters to Santa Claus is a very popular activity for this time of year. However, you can include a lot more kids and A LOT more Expanded Core skills if you put a twist on this popular activity and write letters to North Pole friends. 
This twist give you a handful more opportunities for skills. Here are some ideas:
Learn about the post office and writing letters free matter for the blind
Addressing envelopes (almost a lost art at this time)
Learn how to write a letter with a greeting and a closing. 
Developing and practicing a signature. 
Make choices about the friend you want to write to (I gave my students Santa, Rudolf or Frosty) and what you want to say or write to that person
Teach about weather (what type of weather do you think the North Pole has?)
Writing to North Pole friends as opposed to just Santa means you can do letter correspondence into January (feel free to pick other North Pole friends).
Give different writing prompts (It doesn't just have to be about what you want for a holiday present--you can write about different things).
Literacy, literacy, literacy! Lots of of opportunities for literacy in a project like this.

an image of a big red mailbox that says letters to the North Pole
I found these super cute mailboxes at Target (there's even a light in the outside). We set up the North Pole mailbox in the office with our secretary because that's where the mail is delivered at our school. However, if you are doing this virtual or just at home as a parent you can use your own mailbox. 
I provided students with three choices for their letters. Santa, Rudolf or Frosty. I whipped up these images on Canva. Notice that I used strong contrast for the pictures to make them friendly for low vision and CVI students. My amazing para took the next leg and put the tactile items on it. We LOVE the APH Carousel of Textures kit but you can also hit up a Joanns or Michaels for some tactile paper. She didn't do the whole picture tactile rather just the critical features of each to highlight them. 

a green background with a simple Santa graphic where his beard is made from cotton balls

an image of a black background with a reindeer cartoon smiling with antlers and nose made tactile

A green background with a while snowman wearing a hat and scarf with tactile on those parts
Our students could write in any writing mode that worked for them (and then received a letter in return in that mode). We received letters in Braille, large print and pictures. Now this is the cool part, we had our high school students write the Braille replies. So if you are a teacher with older students, this could be a fun project that your high school students do for younger students on your caseload! 

4 pages spread on a table each with a simple sentence and a picture from a student to Santa
I wanted to include pictures of how we did the picture letters because sometimes that is tricky for folks to know how to do. The above picture is the letter from a student that uses pictures. There are Braille labels over the large print with large clear pictures. We returned his letter in the same format and signed it from Santa with the same Santa picture (plus tactile beard) as the signature. 

4 pages spread on a table each with a simple sentence and a picture as a reply from Santa. the santa picture has cotton balls on the beard.
Now we started this by writing letters to North Pole friends (again, I meant for this to be inclusive for students who do not celebrate Christmas) but can you see where you can keep this going in the new year? You can continue to use actual letters or you can keep practicing and learn how to transfer this to digital communication such as an email or have a lot of fun and move to Twitter!
Teachers, you can make this as a kit and send it to families and then work together virtually. Parents, you can do this in your home. It's an accessible activity that practically every child can participate in. Happy holidays! 


Thursday, December 7, 2017

Braille Cheater Beater

Hi friends, I am so excited to share this post because this is from my hot husband, Todd, who is an itinerant TVI. He has a handful of low vision students who are learning Braille. He kept finding that they always wanted to cheat and peek with their eyes. That's not uncommon. Lots of our kids who are learning Braille and have usable vision try to cheat while doing Braille lessons. My husband wanted to find a way to work bust the cheating and still have a little fun with instruction. 
[The picture below is a picture of the Braille cheater beater which is a black screen the blocks a student from being able to see the Braille. They have to use their fingers to read it only. On the black screen there are Braille cards with contractions on them]
He also made some Braille contraction cards to help with memorization. A lot of his students still like to look at items to learn so he has visual Braille cards. He puts the contractions that he is teaching on the screen to remind the students of the them. (He also made a Braille contraction Go Fish game with cards like this). 

[Side view of the Braille cheater beater screen. You can see how a Braille book fits and the screen blocks the Braille.]
The original version of this has the long legs (as seen in the picture). He later cut the legs shorter so it wasn't so long. He used black felt and CPVC. We just sewed it up on the side to slide over the PVC. It was cheap and easy to make and has worked pretty well with his students. 

 Below are the directions and the materials used to make one. It's worked like a charm to bust the cheating with Braille.


Friday, September 29, 2017

Name Activity for Early Childhood


Happy back to school friends! Sorry for time with no posts. It's been crazy but I have lots of fun ideas all saved on my phone to blog about so I promise to get caught up!
This post is inspired by a typical activity from preschool. I kept seeing all these fun name activities to teach students their names. The goal for our school is to transition our students back to their neighborhood schools so I always like to see what activities they are doing in typical classrooms. 
I found this fun name activities and with a few tweaks made them for our preschoolers. 

Student name in Braille and print

The name activity I made for our Braille readers have actual Braille and simulated Braille using buttons, felt circles or pins. The green dots are textured dots so students can point out individual letters. NOTE: The enlarged dots (made with buttons, pins, etc) are for our pre-Braille readers. It is to "warm up" their fingers and get them learning about the dot combinations. I also used Braille labels to type out their names in Braille. You can also use the ABC stickers from APH (ask your TVI for some stickers--they also have print  & Braille).


I used the KG Red Hands font to make these. I looked around for some free teacher fonts and I like this font because it has a bold and an outline of the font. It's easy to read (not a lot of visual clutter) but still looks like kid font. It is important to know what font size or just size that your little ones can see. Regular ed teachers may need a little support for this from TVIs.  Also, be careful about the white background with lamination. It might be too much glare for some kids (both the laminate and the white could be too much). I made a few other versions of these and used green outline to the letters because some of my students see green (or red) when those highlights are there. Make sure there is still contrast (meaning don't use green letters on green paper--that's probably too much green).

Make sure that whenever there is Braille that there is print as well (as a cheat for people that don't know Braille). See the above picture with the Braille cards.  The teachers had a great idea of putting a straight line of Velcro so students can just put their letters on the line.

Remember to keep your Braille labels consistent like the ones in the picture above. I didn't want our students to feel all over the paper to find the Braille. The Braille letters of Maeve's name are consistent--they are straight and in the same place so she can track.  I liked this idea because it is something that our kids will recognize when they move to the district in an early childhood class. We did make some printouts (with the same font--in the outline version) so our kids could trace and start their writing skills. These are easy to make! You just need cardstock (I also like to add a pop of color as a frame), laminate (they also make non-glare laminate if you have students that are sensitive to glare), Velcro and items to make your Braille (be careful of the size of the buttons. I noticed that one set of sim Braille was a little too big for our students' little fingers).  Best part of this whole activity: it's teaching the Expanded Core Curriculum!

Friday, April 7, 2017

DIY Braille ABC Cards

Hi friends, this week I am sharing another project that was a collaboration with my awesome teachers. One day while I was hanging out in one of our preschool classes I noticed that are future Braille readers were left out of the ABC cards. This wasn't anything to be mean to our Braille readers. Our teacher just didn't have anything like the print ABC cards that our low vision students were using. 
Many print readers have large print letters and activities to help them learn how to recognize and print letters. Annie, our preschool teacher, wanted to include all of her students in the letters center but was a little stumped on how to include her Braille students with the same type of cards her low vision students have. We put our two heads together and came up with these easy DIY Braille cards. These cards are just one idea of many brilliant Braille ideas. 
These are simple to make but a tad time consuming. 
We made a template of the Braille cell and then copied them so that we would have one for all 26 letters of the alphabet. Then they were laminated and cut out. I bought buttons in black and white colors (for contrast). All the buttons were hot glued into the different Braille dot configurations to make 'Braille letters'. Kudos to our amazing paraprofessionals who helped make these sets. They were all hole punched and put on a book ring to keep them organized and easily managed. 
The contrast between the buttons and the paper was meant to be fun for young students. You could easily switch up the colors if you like. Contrasting colors may not always be relevant to future Braille readers. The colors help with appearance with other children in a classroom.
You could also make one Braille cell template, add velcro to both the dots and the buttons so that students could arrange Braille letters (or match to one of the Braille cards) similar to how print students trace or match print letters. 
These ABC Braille cards are part of the Expanded Core Curriculum. Braille instruction is part of the area of compensatory skills. Now don't go thinking that compensatory is the only ECC area covered by these cards! The implementation of the cards can also cover other ECC areas such as career education and independent living skills.
We use these cards in our preschool and with our primary grades (that have children with some additional disabilities). However, feel free to use them with whatever grade or ability of student you would like. 


Sunday, September 25, 2016

Pete The Cat for the ECC!

Pete the Cat for children with vision impairments

If you haven't heard of or read Pete the Cat, you are MISSING out!!I fell in love with the series a few years ago because it was the first book my son could read by himself (Pete the Cat: I Love My White Shoes). It a fun series that has grown from one book to many with several activities, songs and Braille copies available. The stories are catchy and kids (and adults) just love them! 
Many classroom teachers have jumped on the Pete wagon as well so many of our kids have  had a chance to hear/read Pete stories. Many of the books have a central theme that teachers can naturally use to introduce concepts to. They are a great balance of core and expanded core curriculums.

I love that the Pete the Cat series also has repetitive passages which helps with anticipation and language support for elementary age students. I have many students that are echolalia (repeats language and doesn't initiate it). The passages repeat in a way that my students can anticipate the passage and will say it. When I know that they know the passage, I stop talking to allow turn taking to occur.

I first started using Pete the Cat to teach the Expanded Core Curriculum with I Love My White Shoes. Pete teaches all areas of the ECC! With I Love My White Shoes, I did a great hands on lesson that touched on all ECC areas:
compensatory (reading in accessible print, interact appropriately with print)
assistive technology (iPad for students, multimedia with video or CCTV use)
 independent living skills (cooking)
sensory efficiency (touch, taste and smell)
social skills (engages in group activity, learning the social skill from the story)
orientation and mobility (Pete steps "in" a pile of..., walking through things, spatial awareness)
recreation and leisure (reading for fun, discussing the activities in the story)
career education (finishing the story, talking about people/places in the community)
self-determination (giving opinion about liking/disliking books)

If you are not familiar with the book, Pete steps into mud, piles of strawberries and blueberries and then water (that turns his shoes white). I used coordinating foods: Nutella (mud), strawberries and blueberries and whip cream (white). We read the story and then used our foods when it came up in the story. I included real pictures of my activity so you can see that although my lesson was successful, it's not always pretty :)


activity for blind children with the book Pete the Cat I Love My White Shoes
This is a popular activity with the I Love My White Shoes book. Many teachers have done this activity. I want to point out that this is the ECC in the classroom!

activity for blind children with the book Pete the Cat I Love My White Shoes

activity for blind children with the book Pete the Cat I Love My White Shoes

Another of my fave Pete the Cat ECC lessons is Pete the Cat and His Magic Sunglasses. I love using this one to teach about feelings. It once again incorporates many areas of the ECC especially helping with social skills. It's a great way to talk about different feelings. I love to have sunglasses as a tactual item to use while we read. 

Other popular Pete books that teach the ECC is Rocking My School Shoes, Groovy Guide to Life and My Four Groovy Buttons. 
I have used the YouTube videos and the free audio track to incorporate more accessibility. You can get videosand audio here: http://www.petethecatbooks.com/songs/ and https://www.youtube.com/watch?v=lUVgSWsyIE8&list=PLuzeFGWA3a-7qNGsXyNHTw9Au6blfUGao
I have put it on an iPad by making it a PowerPoint book for my kiddos who have multiple impairments or CVI. I love using PowerPoint because I can highlight things/reduce clutter and add motion to pictures in PP. To do this: I took pictures of the book and imported them into PP then added highlights/motion/other needs. You can import the audio track easily to PP books too! 
I also have multiple copies of the book, manipulatives, buttons, etc. while reading with a small group.  This allows our kids to have a smooth read every time we read. There are the traditional stories and early readers of the Pete series to match reading levels of your students. There are also many new Braille versions that are becoming available. 
Parents you can read Pete the Cat at home and do these activities, too! No need to let the classroom teachers have all the fun. Here's a way that you can support both curriculums at home. 
The sky is the limit with teaching Pete the Cat. As always, look to see how it naturally incorporates the ECC (it always does!). Check Pinterest and the internet for lots of Pete the Cat ideas. He is one groovy cat!


Friday, July 29, 2016

Communication Desk for Students with Multiple Impairments


It's almost time to get back to school! If you are a teacher of a student with a multiple impairment including deafblindness or blindness, you need to read this!!
Communication is at the very top of my priority list when it comes to being a teacher. Our kiddos need consistent opportunities for expressive and receptive communication. The second priority on my instruction list is creating defined spaces. Defined spaces allow our students to be anchored in space/environment/body and then sets the framework for anticipation.  

If you are unsure on how to use a calendar box system, read these articles:

The student communication desk idea follows tactual symbols/calendar box system strategy and using a defines space. The students that use these desks that are pictures are those with multiple impairments or show Autistic like behaviors and have significant vision impairments. All of the students are non-verbal. 

The teacher has done a terrific job of implementing tactual/object symbols for instruction. She was stumped because using a traditional finished box was not working. We needed to find a solution that would help students establish that a concept/lesson/symbol was finished but wouldn't fly away (if thrown) and was unique enough that they could comprehend "finished". 
Solution: The object symbols (routine for the day) are laid out across on top. The blue or red felt area that is perpendicular is the finished area. Notice that it is a defined area that is unique. It is a clearly defined finished area. Students place finished symbols on the felt area. These two areas teach spatial awareness (across and top/bottom), literacy (left to right, reading symbols) and self determination (students make choices and can communicate based on the location of the symbols) and communication. 


The student communication desk also teaches compensatory skills including communication and reading their name by tactually identifying their desk (notice the symbol placed at the bottom right of the desk and on their chair). 

Their academic piece as well as any career ed/work for reward also follows a consistent communication system. Notice the discreet trial training boards (penny boards) that have each students' unique symbol. 

Note: We placed their boards and binders on the desk for the purpose of this picture. All of these items may be on the desk at one time depending on activity. It is important to note that each of these items have a specific and consistent placement for students. 


I can't reiterate enough that knowledge is key for using the communication desk idea. You must have knowledge of calendar box systems, creating tactual symbols and communication strategies. There are some terrific articles out there about incorporating, implementing and standardizing tactual symbols for students with vision impairments. Here is one that I really like from Paths to Literacy.
The tactual symbols pictured were created from the APH Tactile Connections Kit. It's a quality kit that can be purchased on quota funds via APH. Make sure you have a quality hot glue gun and hook & loop (Velcro, too!). Always remember that symbols should be easy to replicate (always save extra fabric or duplicates of object). Symbols can be eaten, slobbered on and tossed in a heartbeat. 


I love this desk idea especially for our nonverbal students that do not use a complex communication system. You can build on these symbols and concepts. I love that this teacher uses consistency for the students. And yes, it does implement Expanded Core Curriculum objectives!!

Tuesday, April 5, 2016

Literacy Fun with Chicka Chicka Boom Boom!

We have a long walk from our classrooms to certain areas such as the cafeteria or library on our campus. One of our preschool teachers had a difficult time herding her class back and forth. I saw an idea she tried where she put items for the students to touch on their walk. This gave some anticipation, hurried those little feet along and provided some exploration experiences. I thought it was a great idea and decided to add some literacy fun. I selected the book Chicka Chicka Boom Boom because it is one of the best children's books! It has great rhythm. It was one of my favorites when I was a classroom teacher.

It didn't take me long to create a walkway with the story. The book walk begins with the coconut tree. I had a cardboard box that was the perfect length and width for the base of my tree. I also had this awesome leather fabric that I hot glued around the box. The palms were made out of cardboard (I peeled the layers of cardboard apart. I didn't have anything that was similar to palm leaf that would be as sturdy as cardboard) and spray painted it green. I used plastic balls (like from sensory play ball bins) and used them as my "coconuts".
literacy for blind kids

I didn't want to get carried away with the design. I wanted to keep it simple and accessible for students. Keep that in mind: your textures, items, etc. shouldn't become a distraction. My focus was the story. I also wanted to include some pre-Braille and something for our kiddos with multiple impairments.
I typed everything in Arial bold large print. The letters are highlighted in different colors. I also made Braille letters (so if you see the letter B, you can also feel the Braille letter B on top). I used the standard Braille label paper. I also put Braille on the words "coconut tree". I used tactual symbols for the parts of the story that mention coconut tree. I did that because the goal is that the student starts with touching the coconut tree. I then took the same tactual pieces (leather and ball aka tree and coconut) and placed them on the signs. The leather and ball were consistently placed on every sign. This was specifically for our children who have multiple impairments.

 Braille literacy project

Braille literacy project

Braille literacy project

There is also Braille on the "chicka chicka boom boom".

Something to consider: glare factor. Can you see some glare on the signs? I used our roll laminator but the down side is the glare factor. What to do? I redid some of the signs that got hit hard with light with non-glare laminate. I bought mine from School Specialty but you can look it up anywhere. You can also look for matte laminate to help with this. I also considered the placement of the signs.

Lucky for me that I was given a large print copy of the book. I used it at the beginning of the walk.
This hallway doesn't really have much going on so there aren't too many areas to explore. Literacy is all around us and for kiddos with vision impairments, we have to create opportunities to access it. Can you see how this book walk is an expanded core lesson as well? Hints: think of it's location (orientation and mobility), reading the Braille or symbols (compensatory), recreation of the reading the story (recreation and leisure), discussion of who writes a story (career education)....and the list goes on and on! 


Saturday, September 21, 2013

Object Calendar Binder

Hi friends,
I'm excited to share this find: it's a object calendar binder (although the possibilities are endless). It was made by East Hartford Women's Club. Before I describe this great project, let's check out the pictures:


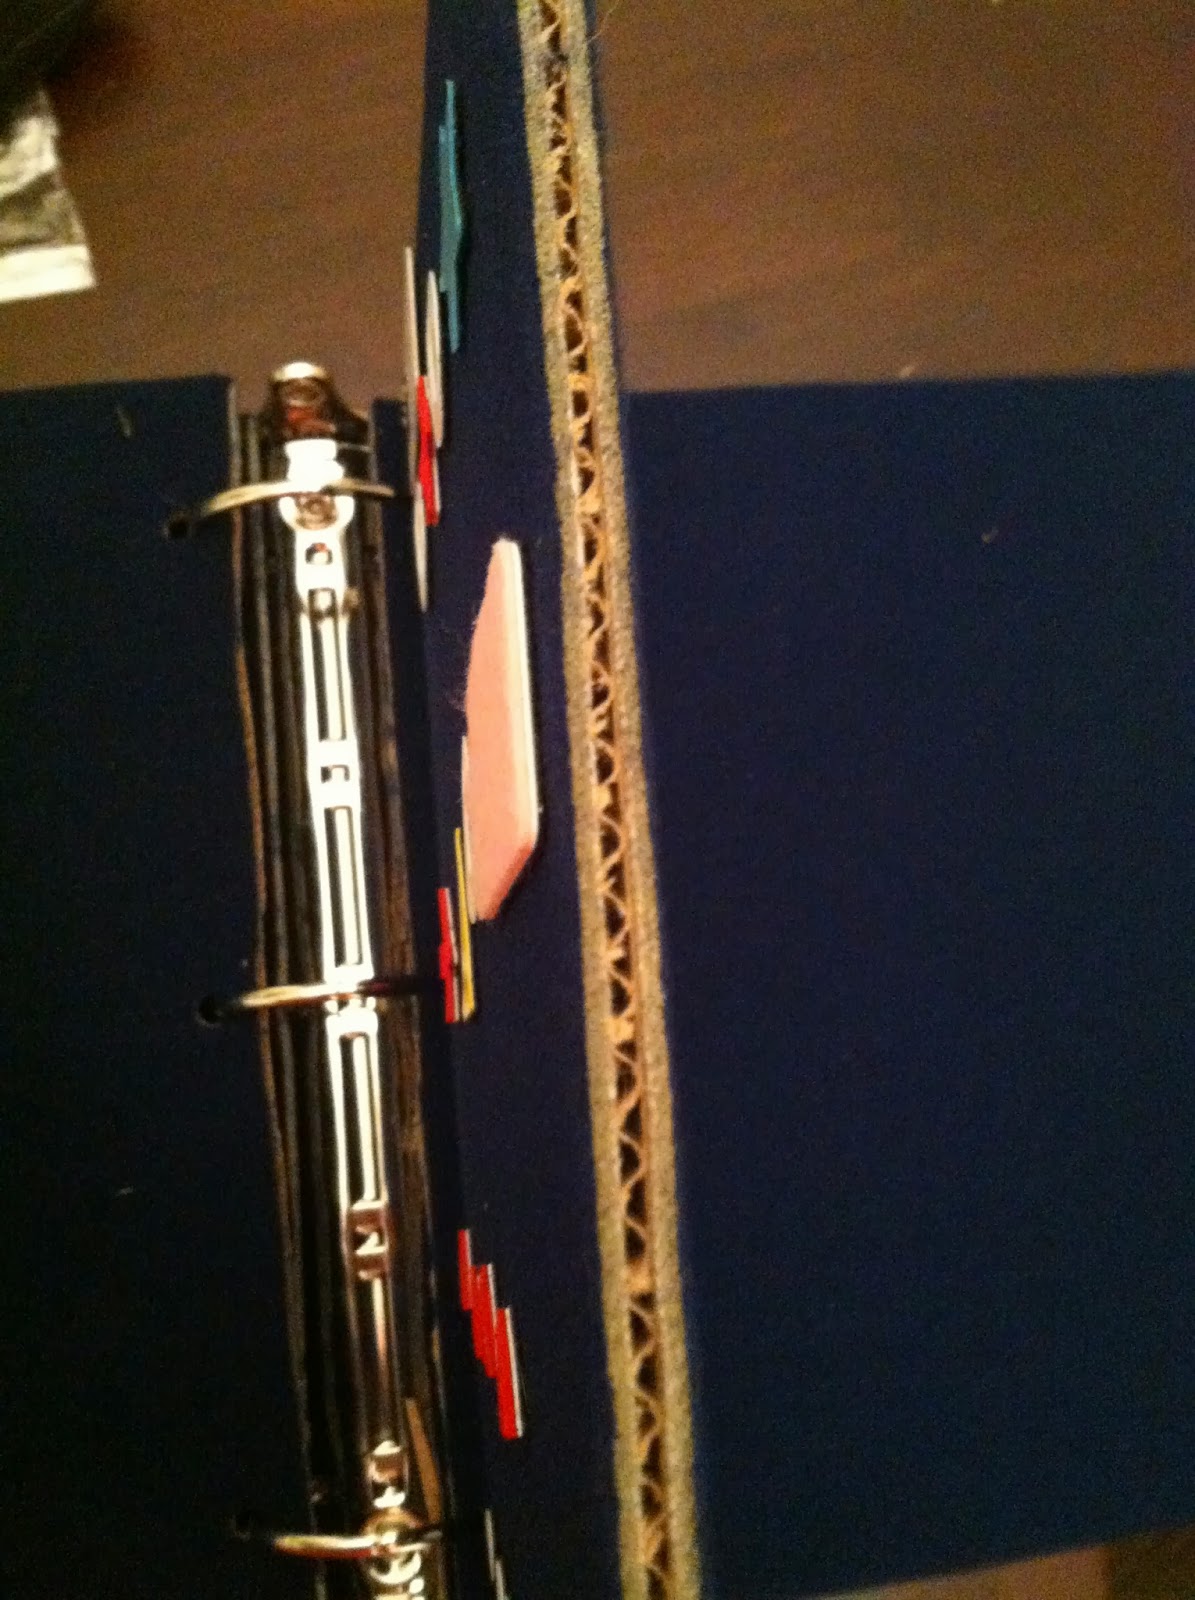
This binder has 6 pages. The pages are cardboard covered in nyloop. Nyloop can be tricky to find at first but once you find a local source, you are set! Nyloop is great because you can use a little velcro and objects stick right to it. The pictures show some ideas of what you can do. You can use it for matching activities, matching or sequencing. I like the idea of using it as a calendar box system. I recommend the binder idea for kids with multiple impairments. These binders are great because they are pretty durable, too.

Friday, August 30, 2013

Playful O&M & Book Ideas

Hi friends,
I was doing the usual Google search for articles and came across a handout for some playful O&M songs. I thought it was cute and decided to share. This isn't my article. I posted the original with the author's name. It also has a nice listing of books that feature kids with a vision impairment. I liked these and thought they could be added to the classroom libraries where we have kids. 
Playful O&M
Maya Delgado Greenberg,
M.A., C.O.M.S.,
Orientation and Mobility Specialist
C.A.O.M.S. Conference
November 2007

Books featuring children with visual impairments
http://www.iowa-braille.k12.ia.us/bibliography_of_blind.html
The Sound of Colors: A Journey of the Imagination by Jimmy Liao . In this breathtaking, evocative book, a young blind girl travels from one subway station to another while her imagination takes her to impossibly wonderful places. She swims with the dolphins and sunbathes on a whales back; flies through the air with the birds and travels to the station at the end of the world. 
Night Search Chamberlain, Kate. Hollidaysburg, PA: Jason and Nordic, 1997. 32 p. Heather, who is blind, resists using her white cane until one night while camping her puppy wanders off. Heather tries to find the puppy. She finds a stick which helps, but she realizes that her white cane is a very valuable helper. 
• Mandy Sue Day Karim, Roberta. New York: Clarion, 1994. Unpaged. Using her senses of taste, hearing, touch, and smell, a blind girl enjoys a special day on the farm. Using rhythmic language, the author conveys the exuberance and excitement of Mandy’s day with her horse, Ben. 
Listen for the Bus: David’s Story McMahon, Patricia. Honesdale, PA: Caroline House, 1995. Unpaged. A real life look at David, who is blind and hearing impaired, as he begins kindergarten. Photos show all parts of his day and also explain the signs he uses because of his deafness. 
Sarah's Sleepover. Rodriguez, Bobbie. New York: Viking, 2000. Unpaged. When the lights go out while her cousins are spending the night, a young blind girl shows them what to do in the dark. 
Out-of-Print, but you still might be able to find them….
· Family of Owen M.: Off We Go to Learn Everyday Things About Orientation and Mobility Flaherty, Erin. Philadelphia, PA: Hill, 1997. Unpaged. "Learn everyday things about orientation and mobility" is the theme of this lighthearted, illustrated book about a blind boy named Owen M. and his family. A perfect tool to teach classmates, parents, and friends of blind children how O&M helps Owen travel around his house, in stores, and outside. 
· Travel Tales: A Mobility Storybook by Julia Halpern-Gold, Robin W. Adler, and Shelly Faust-Jones (Paperback - Nov 1988). This large print, paperback book, is geared for pre-school and early elementary students with visual impairments. Designed to reinforce different environmental concepts in which a child would travel, it features a boy named Elliot, who is blind. Elliot provides a positive role model for blind children as he travels through the supermarket, in the subway, around the block, all around the town. 

White Cane Song Book
Created by Lori Cassels and David Renslow
Wheels on the Bus
The wheels on the bus go round and round – round and round – round and round
The wheels on the bus go round and round all through the town
The cane on the bus goes tap, tap, tap - tap, tap, tap - tap, tap, tap 
The cane on the bus goes tap, tap, tap all through the town
The driver on the bus says here’s your stop - here’s your stop - here’s your stop
The driver on the bus says here’s your stop all through the town
The cane on the bus goes tap, tap, tap - tap, tap, tap - tap, tap, tap 
The cane on the bus goes tap, tap, tap all through the town

This Is the Way
This is the way we tap our canes, tap our canes, tap our canes
This is the way we tap our canes all around our school
We always keep our cane in front, cane in front, cane in front
We always keep our cane in front, all around our school
We always keep our cane tip down, cane tip down, cane tip down
We always keep our cane tip down, all around our school
This is the way we tap our canes, tap our canes, tap our canes
This is the way we tap our canes all around our school

I’ve Been Working With My White Cane (tune I’ve Been Working on the Railroad)
I’ve been working with my white cane, all the live long day
I’ve been working with my white cane just to help me find my way
Can’t you hear my cane go tapping. Keeping my cane tip down!
I love to hear my cane go tapping. It helps me get around.
My cane helps me go – My cane helps me go – 
My cane helps me go all over
My cane helps me go – My cane helps me go
My cane helps me get around.
(solo)
I left my cane in the dining hall. I left it there yesterday.
I left my cane in the dining hall, now I can’t find my way.

Walking Down the Streets with our Canes (Tune of Coming around the Mountain)
We’ll be walking down the streets with our canes (tap – tap) 2X
We’ll be walking down the streets 2X
We’ll be walking down the streets with our canes (tap – tap) 
We’ll be keeping our cane tips down as we walk (tap – tap) 2X
We’ll be keeping our cane tips down 2XWe’ll be keeping our cane tips down as we walk (tap – tap) 
We’ll be keeping our canes in front as we walk (tap – tap) 2X
We’ll be keeping our cane tips down 2X
We’ll be keeping our cane tips down as we walk (tap – tap) 
Upper Protective Technique (to the tune of Oh My Darling Clementine)—adapted from Travel Tales, a Mobility Storybook
Put your arm up, bend your elbow
Keep your fingers nice and straight.
Your hand will protect you,
So you won’t bump your face (ouch!)
Left or right hand
Doesn’t matter
Use your hands, not your feet (pretend to try to put foot in front of face)
Use it in your classroom
In your house, and on the street.

Tuesday, November 20, 2012

DIY Tactual Books


Tactual Book Project

Book One: Graduated Pages Book
Materials
5 different types of (texture) fabric (smooth, soft, rough, silky, etc.)
Hot glue & glue gun
Sewing machine
Folder/sturdy book back for each book

How to assemble the graduated pages book:
Take each of the 5 different sizes and cut them to size:
10x10 square, 8x10, 6x10, 4x10, 3x10
Assemble fabric (with 10x10 on the bottom, stacking each size up so that smallest is on top).
Sew up the left edge (“spine” of the book).
Place inside folder with hot glue at the spine.


 graduated pages book

 book making fun


Book Two: Fabric Squares Board
Materials
5 different types of (texture) fabric (smooth, soft, rough, silky, etc.)
Sturdy foam board cut into a large square (18x18)
Cut fabric into 9 equal pieces (like a Tic-Tac-Toe board)
Glue fabric onto foam board (like a Tic-Tac-Toe board)


Book Three: Giant Square Book 
Materials 
5 different types of (texture) fabric (smooth, soft, rough, silky, etc.)
Foam board
Large rings
Exacto knife
scissors
How to assemble this book:
Cut fabric to 11x14. All uniform cut. No frayed edges. Edges can be sewn or burned for finish.
Cut foam board to 11 ½ x14 ½
Cut two holes at the top of fabric. Fabric should lay horizontal with holes punched at top (See picture).
Punch two holes at the top of the foam board. Punch holes in the exact same places as in the fabric so that both foam board holes and fabric holes line up.


all of the squares cut, then assembled and hot glued to foam board

Tips to remember:

  • Patterns count so be watchful for aggressive patterns.
  • Shiny red sequins (that are sturdy) are always a good find
  • Put contrasting fabric types together. Although I always say you can't understand blindness by simply closing your eyes, for this one close your eyes. Feel for strong contrasts like burlap and silk.

Monday, July 2, 2012

More literacy bags!!

I hope that you didn't think that I was gone! I am not gone but am happily back to my weekly posts. Our gifted Education Consultants, Catherine Summ and Lisa Pruner, are back at it and have created stellar additions to their literacy bags line up. I have to admit, these two new ones are my favorite! The first one is about recycling. They even include some items to recycle and a board game (sorry it's crooked!). The second one is a science experiment one. SO fun!! You can contact Catherine or Lisa for more information (see previous postings for more information). Summer reading is a fun family project!!