Friday, April 19, 2019

Join the ONH Discussion Group!


Join us for the ONH Discussion Group! The ONH Discussion Group is a free resource group to learn about optic nerve hypoplasia (ONH). We increasingly see more students with ONH. ONH is another spectrum vision impairment. Many of us in the vision impairment education community struggle to understand the educational implications from ONH. 
That is why I created the ONH Discussion Group! Come and learn in our free Zoom meetings about resources, strategies and information about ONH. Each month we have a different topic related to ONH. Parents, teachers and related servers are all invited to join and contribute to the group. 
Join the distribution group email: https://docs.google.com/forms/d/e/1FAIpQLSe6MGUdqsFd8ho59kCqd-Kb5SfWF3f6iUBWJ2KTZe4nX7-AZw/viewform?usp=sf_link . The distribution group email will send updates and meeting information for monthly Zoom meetings. We also have an ONH Google Drive resource folder.  
Join us!

Monday, April 1, 2019

Teach Coding with the Expanded Core!

Teach Coding Using the Expanded Core Curriculum graphic
I have been loving teaching STEM as part of my Expanded Core instruction. There are so many areas where you can overlap both and have meaningful instruction. Coding can be difficult for students with vision impairments. There are some new things coming out to help with this but in the meantime, what do we do? Coding is often not accessible because most assistive technology readers are for text recognition. Coding programs are often object recognition and not accessible with screen readers. I did a lot of research about how we can still teach the foundations of coding. There are a ton of good ideas with teaching offline coding. Offline coding teaches the principles of coding without using a computer. It's not completely ideal (since we do want to teach all of coding for our students) but it does have a lot of ECC benefits. 

The offline coding cards are scattered on a table.
You can buy a variety of different offline coding activities from sites like Teachers Pay Teachers (I love that site!!). I have a new robotics unit that I developed and coding or programming is the foundation skillset. I needed to make sure that these skills were solid before applying them to the actual robots. Many of the lesson plans that I could purchase weren't super accessible. The main problems were too cutsy fonts that weren't easily read by students. I decided to research and learn about making my own coding cards. See the pictures above and below for what I made. I used a nice clear font with contrast in specific places. I also organized them with the same layout--meaning that there is an object or logo on top (so that students can learn to read or code by object), the directions (turn left/right, go straight, etc.). Last, there is a square box and that is where we use mini post it notes to indicate the number (i.e. spin around 4 times, repeat 2 times, etc.). We laminated them. I'll admit that I was nervous about using traditional laminate. I almost used the non-glare laminate. My students ended up being good with traditional laminate but always consider that when laminating. Then my best para in the world made all the Braille labels for me. 

Offline coding cards are scattered on a table

The first half of my lesson is all about teaching what writing a good program means. I include how specific their line of code has to be. Then we discuss each card so that everyone is on the same page with instruction. I have the students stand up and do this. Everyone turns right, left, goes straight, etc. so that they can perform the task exactly. You will get great ideas from STEM teacher blogs about their ideas with teaching this. I put my ECC hat on because I knew that I was working some good OM skills with this. I made sure the students could execute a 90 degree turn or 180 degree turn with good foot placement. You can do this for typically developing students and for students that have additional disabilities. For students who need more basic lesson plans, we stick to following the directions from the line of code. My typical students continue to more complex coding and I include if/then situations for them. 

An image of a students hands reading the Braille labels on the coding cards
This is a great team building project too. Now I can incorporate other ECC areas in this as the students work to program lines of code for each other to follow. They have to work together to make sure that the student does exactly what the line says. They problem solve and inspect their own work. Once they get a good feel for it, they program  for me. They have the challenge to get me from a designated point one to a point two with an obstacle. I do exactly what they say. They have to get me from a chair on one side of the room to the door. We use tactile maps and other supports as we put together a line of code to make this happen. Are you getting ideas on how you can infuse ECC skills?? I have students write me a line of code to get a backpack from a locker, go into the kitchen and get a snack, etc. You can do so much more than orientation & mobility with this AND you are teaching STEM! Want a set of my offline coding cards? Send me an email and I'm happy to share (FREEBIE!!). You just have to do your own Braille ;)

A female student arranges the cards into a line of code
STEM & the Expanded Core are a great mashup of learning. So many opportunities for our students!

Friday, March 29, 2019

Flipgrid + ECC =Success!


Image graphic that says Teach the ECC using Flipgrid

Have you heard of Flipgrid? Before I can tell you why it's so awesome, let me explain what it is.
From the website: Flipgrid is the leading video discussion platform for millions of PreK to PhD educators, students, and families in 180+ countries. Teachers set up "grids" which are topics. Teachers post questions or topics and students comment on them individually with their own video. General education loves using Flipgrid. I'm always thankful for our education technology specialist who keeps me in the loop of these things. We tested it with our AT specialist and realized that Flipgrid is very accessible (especially on Apple products with VoiceOver). Now that I understood what Flipgrid was, I knew I could use it teach the Expanded Core! The first thing I do is head to my ECC assessment tools and start making a list of EVALS skills. This helps me infuse skills into lesson plans. I always write lesson plans so I can focus on what my objective, procedure, ECC skills and instruction cues will be.

How can you use Flipgrid to teach the Expanded Core? 
This is an awesome idea for itinerant teachers. It allows me to do a lot of teaching remotely. I can post topics/questions/assignments and then students can respond to them. I use it in a variety of ways. Flipgrid is very helpful because it allows me to teach students who live close and students far. I currently have students that live 2 to 4 hours away from me. Important: you can't teach everything from the ECC on Flipgrid. But you can teach a lot of things! In fact, simply using Flipgrid is an ECC lesson because it alone has ECC skills. I love when I hear my students using VO when starting their videos. 

 I've included some screenshots. Below you will see my homepage with 3 of my most current "grids" (or topics). I use them in a variety of my classes. Currently I have 3 live grids: Study Abroad Canada, Accessible Arts Academy and Expanded Core.

Screen shot of Flipgrid screen with 3 grids on it.

Screenshot of the topic details page in Flipgrid

I post a variety of topics each class. This allows you to encourage students to "field trips". I assign students to do certain tasks and then video their responses. Don't just limit it to you (as the teacher) posting assignments. For my Study Abroad Class, I have a few students who are leading the discussions and posting topics. As the teacher, you can grade, provide feedback, etc. to students. I even invite guest teachers to join me and help teach. 

Screenshot of videos list posted by students.
It's hard to coordinate your schedule and student's schedules but Flipgrid allows you to (almost) have an authentic conversation on your own time. I post my topic/assignment/lecture thought and then I give a deadline for my students to reply. I also love that Flipgrid connects students. They don't have to be in the same place to interact with each other. They can reply directly to other's videos. It's a great way for students to get to know others. I also have my mentors join me as guest teachers (or called "co-pilots" on Flipgrid). 


Another feature that I like is that this mainstream general education. My students are using the same educational technology that their peers in their own school are using. They learn to upload videos, links, etc. and develop their tech skills. You can also use Flipgrid for PLCs!

Screenshot of a video Flipgrid page with a teacher making a funny face.
I've used Flipgrid for discussions, assignments, quizzes and even field trips! Sometimes I take my students on a "field trip" somewhere and video where I am or I have them take me on a field trip to show me how they would access a location. There is a time limit for a maximum of 5 minutes per video. I like that because it allows me to give direct feedback on a particular skill. They may have multiple videos that go with that skill and they can upload as many as they want for the assignment. I can give direct feedback to each video. 
We have a lot of fun taking the "selfie" for each video. We always end our videos and take pictures with a funny face. It's a fun tradition that we have in our Flipgrid discussions. I love how effective I can be utilizing this tool. There are so many ideas floating around on how general education teachers are using Flipgrid. I check out YouTube and other EdTEch sites to get ideas because I want to align how I use it with general ed. It allows me to teach my students to use Flipgrid like their sighted peers. 
Here's a tutorial on using Flipgrid:
My last idea for using Flipgrid: use it with your parents! As teachers, we have a special responsibility to teach our parents about the Expanded Core. Use Flipgrid to connect to your parents. You can take videos of their children doing lessons with you or to share bits about the ECC. It's vey easy for parents to learn, too! I'd love to hear how you use it for your ECC lessons.  I'll keep posting my ideas, too!

Friday, March 22, 2019

ECC Assessments


Hello friends!
Did you think I quit writing here on The Bee? I didn't!! I've just been busy on my social media accounts, 9MoreThanCore and developing SO many new programs. It's been busy and I have felt awful that I have neglected The Bee. Have no fear, I am here!!

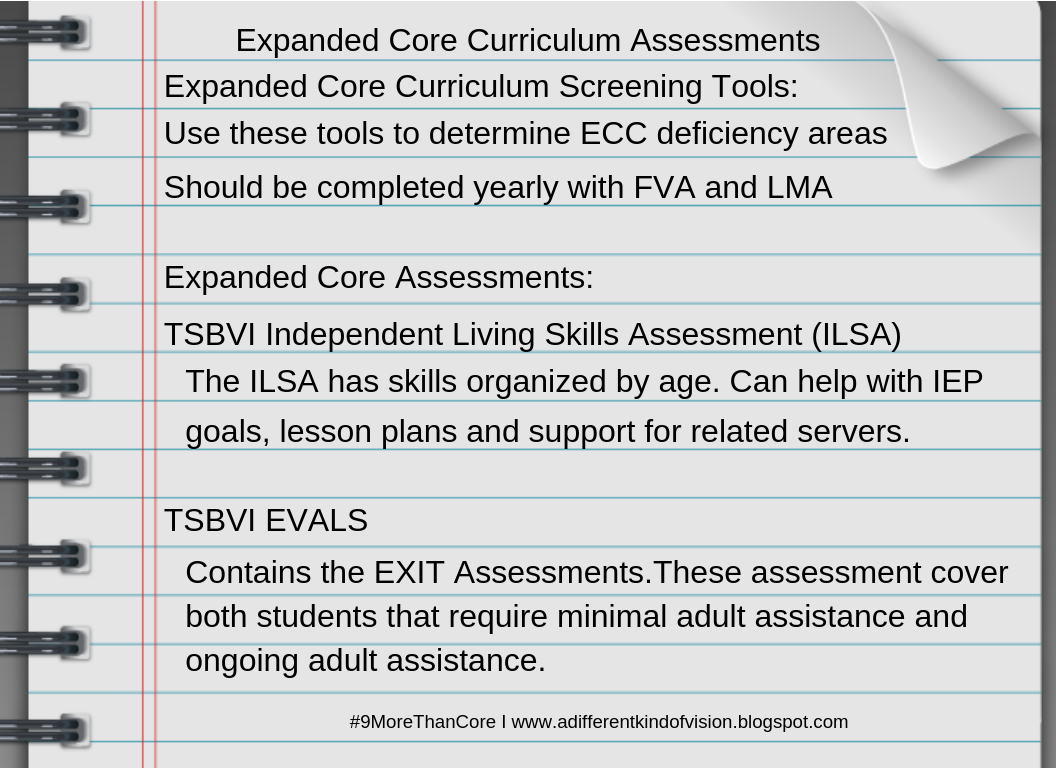
I find that many teachers are unsure about using ECC assessments. I whipped up a little image to help you see what assessments you should be using for the Expanded Core.

First, you need a screening tool. There are a handful of awesome ones that I love.
Here's a few links to some great screening tools:
The first one comes from the site EA Rubrics under the supervision of Dr. Karen Blankenship. Save this link because it has a ton of great resources for teachers of students with vision impairments: http://earubric-001-site1.mysitepanel.net/ecc-needs-assessment/
The other site is another treasure of items. It's Teaching the Visually Impaired by Carmen Willing. She has a really nice organized ECC Screening Tool: https://www.teachingvisuallyimpaired.com/ecc.html. I recommended becoming a member of her site. She has a lot of great resources.

Dr. Karen Blankenship advises all teachers of students with vision impairments to complete all three--FVA, LMA and ECC Screening Tool on a yearly basis. Many teachers are unaware of the resources that we have for ECC Assessments.  Our resources cover birth-21 and include students with additional disabilities. There truly is something for everyone! I encourage all my teachers, both itinerant and classroom to make sure they have access to EVALS. The EVALS kit includes the Independent Living Skills Assessment, Basic Skills Infused Skills Assessment, EXIT Assessment and  the EVALS ECC areas such as pre-Braille.  It can be purchased from TSBVI: https://www.tsbvi.edu/curriculum-a-publications/3/1030-evals-evaluating-visually-impaired-students.

Make sure you are completing the appropriate ECC assessment for your students and utilizing these awesome tools!
Happy ECC-ing!


Wednesday, November 21, 2018

Learn About Community Partners Using the Expanded Core

a graphic that reads the title of this blogpost
I just completed my latest ECC kit, Community Partners and I am so excited about it. One of my preschool teachers wanted a kit to help with teaching about community partners. Let me show what I came up with!
First, let me go right to our assessment tools and resources from the Expanded Core Curriculum. This way I can infuse skills in every aspect. I always go to my ECC tools first so I can have a clear picture of what skills, concepts, etc. I need to teach. I hit up the Independent Living Skills Assessment (ILSA) and Elementary Concepts from TSBVI (see earlier posts on using Elementary Concepts). There was a whole unit on community partners in Elementary Concepts so I copied the section for my teachers to use. Lots of good ideas for both core and Expanded Core learning (with art, music, writing, etc ideas). I also found some fun color and cut headbands from Totschooling.net (I signed up for free and they have all kinds of things). 
A picture of the Elementary Concepts community partners unit and the templates for the cut and color headbands
Next I hit up Pinterest and Teachers Pay Teachers to find some ideas and resources that general education is using. Remember, we always want to be in alignment with core and general education because it keeps our students included in their classrooms. Plus, TPT has GREAT finds that are pretty cheap. I love TPT!

Four of the movement community partners cards. For example: brush your teeth like a dentist
I found these awesome movement cards for $3.00 on TPT. They are available in large and small sizes (or in large print as I like to think of it...). Look at how great these cards are!! I had my intermediate grade students do all the Braille for me (bonus ECC instruction as we discussed as they brailled...). *You can't see the Braille labels very well but they are on there!*
I also went and found the props that go with each card. For example, a newspaper, wrench, toothbrush and cut up hose. Now we have meaningful tactual items for the movement. 
Screen shot of the Teachers Pay Teachers store where you can buy the movement cards
I happen to have some preschool items that I purchased for my early thoughts with dramatic play with community partners. You can easily hit up a Kid to Kid or other kids consignment shop for some items. I also purchased some from Lakeshore. Kids love to dress up for dramatic play (plus it's another ECC bonus because you can work on dressing skills!)

a picture of a doctor kit

an image of the mail carrier dress up outfit with Braille label
We added Braille labels to all the print labels on the dramatic play clothes. Add a little super glue (carefully!) so that the Braille labels stick long term. 

a picture of the back of the construction workers vest with Braille label on it

a photo of some of the community partners dress up outfits.

a photo of all the contents in the community partners kit
We packaged up the costumes into large ziploc bags and logged the contents. I like to do this to keep track of things. We are not done yet! We still have more items in our ECC kit. 

I also found this fun idea from Pinterest to build a photo town. Here's the link: http://www.toddlerapproved.com/2015/03/build-around-town-photo-wall.html.
There's lots of good ideas in this post! There are accessibility settings on phones (iPhones for sure) that allows students with vision impairments to take pics with feedback. Go around your town and take pictures of your town to build your photo town. See the post for more ideas. There are so many good ones that are totally doable for our students! Extend your ECC learning by visiting these places and taking your pictures there OR it can be ECC homework for students to do with their families. 
a photo of the blog post for the photo town
I decided to have some starter photos for our town so I Googled some free pics of things and made labels (with Braille on it--can't see in picture). It was easy peasy to make the board. Bonus ECC instruction: you can work in spatial skills directions because you can discuss top/botton, left/right and count squares and use systematic search patterns. 
a stack of photos from places around the community


a photo of the community partners kit
The last part of our kit has to do with signs in the community. We included a number of directional signs and this real working stoplight to talk about navigating around our community. This stoplight totally works! I found it at Hobby Lobby on sale for $40! It's got metal on it so it has an authentic feel. Plus it's great for students who have no vision who always hear people talking about a stop light but have never 'seen' it before. 
a photo of the toy street light from the kit
There is SO much learning that you can do with this ECC Community Partners kit! Other ideas include: asking members of the community to come to your classroom OR scheduling a visit to their location and build an experience book based on the community partners you learned about. Just make sure you hit up our ECC resources to see all the skills from play to compensatory skills that can be included. ILSA is a great tool for this! 
See you in the community!!


Friday, October 19, 2018

Teach the Expanded Core Using the Junior Achievement Program

I have to share one of my favorite resources for ECC instruction: Junior Achievement! Junior Achievement also known as JA is a serious jackpot when it comes to teaching the Expanded Core. I've been using it for years and have been able to use the curriculum to expand to all things ECC! I use a variety of JA programs for students as young as first grade through my high schoolers. Why JA? First, I did JA when I was kid and had some good memories of it. Now fast forward several years to my own kids doing JA. I was one of the parent volunteers for the big JA BizTown field trip. Holy cow, the moment I walked into JA BizTown I knew it was the Expanded Core everywhere! JA BizTown is a complete replica of a city with real life everything---cash registers at Chick Fil-A, city hall, post office, etc. Then I got to wondering what did JA teach. The question I should have asked was what doesn't JA teach!? 

Junior Achievement logo
I contacted Junior Achievement Utah because I wanted more information on the Junior Achievement program, the curriculums/programs and to let them know I saw potential for students with vision impairments to use them in a unique way (as part of our ECC instruction!). Side note: I always like to contact the company of a new product/curriculum that I use when I find ECC potential because I want them to be informed about our population of students. I also like to partner with them because the more they learn about our student's needs, the more everyone benefits. I've had such a good experience with this. So many companies have been open to collaborating with me! I have loved it!! Junior Achievement was top notch with working with me. I explained about the ECC, what I do and my vision for incorporating JA programs (as I knew it would look a little different with me...).  There were two other real stand out items that attracted me to Junior Achievement (aside from my fun time at JA BizTown): JA is popular in school districts so it wouldn't be something different for our students and JA programs are FREE! (note: It was free in Utah but I can't confirm this everywhere however I am super hopeful that it is!!).  JA programs are very popular in schools so it has a natural social conversation for our students to say that they are doing it, too. 

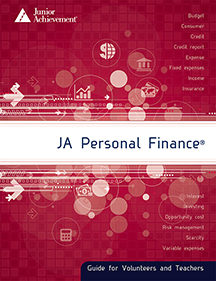
JA Personal Finance Program cover
Every JA program lists what elements of the Core curriculum it includes. I like it because I can easily see how I am targeting academic areas. Each program is divided into about 4-5 weeks. I follow the program as it is laid out because it is strategically put together.  I review the objectives and the extension learning for each unit and then I hit up all my ECC resources (you know, EVALS and ILSA) to make sure I am covering my ECC instruction.  I regularly take skills from EVALS and ILSA and infuse it right into my lesson plans. I also use my ECC Activity Worksheet (see my other post on it) to check my ECC instruction.
JA Ourselves Program Cover
I use JA programs for both my campus programs and my Outreach students (students attending their neighborhood schools).  I create quizzes for each unit and a final exam at the end of the program. (all on Google quizzes and Canvas). I LOVE JUNIOR ACHIEVEMENT!! Their lessons are thoughtful and laid out so well that it is not a headache for me to learn the material. I stick to the material from the lesson plan book and infuse A LOT of ECC before, during and after. 
Here are two examples of how I infuse ECC instruction with the JA programs: With It's My Business, I am doing an entrepreneurial program with my high school students. They are to do a group project on creating a Teen Club. I extended it that they had to do a formal presentation on PowerPoint/Google Slides. We paused the JA program and did some lessons on using AT for the presentation, what makes a good presentation, etc. (which still compliments the JA program). Another example is with my younger students with the JA Ourselves program, students earned "ECC Bucks" by completing simple tasks for various amounts around our school. Their "ECC Bucks" (real printed ECC money) was converted at the First National Bank of Robbin into real money. We headed to the grocery store and made a purchase (with instruction on needs and wants from the JA Ourselves program).
  JA More than Money
JA More than Money
I use JA as a class (in the ECC Lab  on campus) and as curriculum for short term programs (so much easier for my staff to follow). I do my best to stick to the grade levels that are established by the JA program. I modified the JA More than Money program for older students. It was originally written for younger students but the content was good and it set a foundation for the next program that we did. There are a fair amount of visual or not accessible materials but nothing that is impossible to work with. I retype all my JA lesson plans into Google Docs in large print because I always make a handout after each session for students to reference and study.  I do this because I keep my MacBook with me during my lessons. I take notes during the sessions because many times students will say things that help other students learn the concepts or expand the concept. I include that in the handout. 
My main accessibility resource is typing skills! I am grateful for awesome support staff that Braille items and set up things as needed. 

JA alumni are 30% more likely to have their bachelor's degree than the general population.
JA alumni are 30% more likely to have their bachelor's degree than the general population. 
Have I convinced you that Junior Achievement is a great resource for providing Expanded Core instruction? I have had a lot of success with it. They have programs on financial literacy, career education, leadership and a lot more.  Check out Junior Achievement in your area: https://www.juniorachievement.org/web/ja-usa/home

JA Career Success Program cover
If you use Junior Achievement, let me know! I'd love to collaborate with you. Junior Achievement Utah has been awesome to work with. Yay for another resource to provide Expanded Core instruction!!