Showing posts with label Expanded Core Curriculum. Show all posts

Tuesday, December 1, 2020

The Power of Theater and the Expanded Core Curriculum

A graphic that reads The Power of Theater and the Expanded Core Curriculum for students with vision impairments. A new blog series for youth with vision impairments with Blind Ambition's Frankie Ann Marcille. 

As a visually impaired adult now working towards developing a career in teaching the Expanded Core Curriculum, I have thought a lot about what the most meaningful experiences were throughout my teenage years. I’ve thought about experiences that gave me real time, true to life opportunities to learn valuable lessons in the ECC. One such experience was my time participating in theatre.


I first started participating in theatre when I was just two years old. My parents signed me up for dance classes and let’s just say-that was it! I fell in love. I have never stopped dancing. From there my passion only continued to grow when I performed in my first musical at age six. I continued performing, participating in at least two shows per year with my various schools, dance studios, etc. from elementary school through high school. I even went on to major in Theatre for my undergraduate degree.


Looking back, I realize how much the arts did for me as a child/teenager with a vision impairment. Participating in theatre/dance programs taught me discipline and advocacy. Because I was the only person in all of my programs with a vision impairment, it was up to me to let my instructors know what I needed and work with them to find a solution as to how I could best participate. They taught me confidence and self determination. Theatre showed me how I could be confident in myself and my abilities as a woman with a vision impairment. I felt like if I could get on stage and perform for crowds of people, I could stand up and tell people about my vision/ I could engage with others in meaningful discussions about my future and my dreams. 


Most practically though- theatre helped me to understand basic social interaction skills. There was so much that I realized I didn’t understand as a person with a vision impairment. I didn’t realize I didn’t make eye contact. I didn’t realize sometimes that my facial expressions said more to others and I often missed seeing other’s facial expressions and picking up on subtle cues. However, theatre helped me to work on these skills. Because of this, I have come up with a new way to teach social interaction as a part of the ECC.


I have put together a curriculum of social interaction based theatre games to help other blind and visually impaired students to learn these same skills in a way that is more than just educational. This curriculum is emotional, engaging, true to life, and did I mention...FUN!! I am so excited to share some of them with you here on “The Independent LIttle Bee”! Keep an eye out and until then…


Stay Ambitious!

Frankie Ann


Sunday, November 15, 2020

Teach the Expanded Core Curriculum with a Murder Mystery Party

Graphic that features Gatsby era clipart that says Teach the Expanded Core with a Murder Mystery Party
We have new ways of teaching in today's world. This is exciting because it is empowering us to find new meaningful ways to teach the Expanded Core. My new favorite activity? A murder mystery! Yasssss, it was awesome!  Murder mystery parties are fantastic for teaching the Expanded Core because it really pushes our students to ask questions, pay attention to details and work on their problem solving skills. 
A female student reads the Braille clue
I know you are excited about this idea but are you wondering where to even start? Don't recreate the wheel on this one. We bought a murder mystery game and then went to work on infusing ECC. We bought ours from Red Herring Games. Ours was The Great Spatsby: https://www.red-herring-games.com/events/murder-at-great-spatsby/.  Yes, they have virtual games, too!!
Step one is to get the game. 
Step two: identify what you need to pre-teach. I can't stress this enough--we have to create the best conditions for learning. This often means pre-teaching so our students have an idea of what's going to happen or to plot their move. We did three pre-teach sessions. These sessions focused on The Gatsby era of US history. We focused on the "backstory" of the setting of our game. For example, we discussed the impact of the stock market crash, the Great Depression, opulence and wealth in the elite class, etc. 

a clue that is a tray with a wine bottle and two glasses
Step three: accessibility. We made sure all of our clues were tactile, Braille copies of anything in print and large print tags on things. Accessibility wasn't just having things in accessible form. We did this in a vintage hotel so the setting was spot on, the characters were in dress and character. Pretty much everything that was visual was brought to life and accessible. 

a clue that is a doctor bag with a large print label attaached to it

an image of a scene from the party where the students interview a woman dressed as a flapper who stands at a table with "the body" covered by a sheet.

Step four: characters. The characters were the essence of the party! They had to be spot on. Fortunately, Red Herring games comes with scripts which made a lot of this possible. We roped in fun people from our school including our superintendent (she's the maid) and our campus director (pictured next to her). We also included our college transition students in the fun. They worked on their part with the coaching of Frankie Ann (from Blind Ambition who blogs here on The Bee). 

A collage of six pictures featuring the six characters from the murder mystery party such as the maid, the inspector, etc
Step five: TIME. We provided support on asking good questions, how to evaluate details and facts and then provided students time to work this out as groups. Oh man, can you see all the Expanded Core skills?? They are literally ooozing out of this idea! There were so many skills that we intentionally planned/infused for. 
We ended with light refreshments and a fun social gathering as we learned from Inspector Dina Tracy (aka Robbin) who the culprit was (it was the maid!). And just in case you were wondering how we pulled this off during Covid, everyone wore masks, practiced social distance as much as possible, temp checks and lot of cleaning. Check out videos of our fun night on 9MoreThanCore on Instagram. 
By the way, this was so awesome that this is our new annual October event! 

Wednesday, August 26, 2020

ECC Chill Pill Lesson

A graphic that says ECC Chill Pill Lesson: Put a ECC twist on a popular activity
Happy back to school friends! I know it is crazy right now but we can still provide meaningful Expanded Core instruction for our students. Check out this fun idea: make chill pills with students. Huh? I'm sure you have seen this fun idea floating around on Pinterest or other craft places. You can take this fun idea and infuse a TON of ECC learning and skills practice for students of various abilities. 

A close up of the ECC chill pill bottle with the label that explains how you will become happy when taking the pills
 I referenced our ECC assessments (you should do this, too!)
Here's a few of my ideas of how you can infuse ECC learning:
Community learning: what is a pharmacy? learn about employees that work there--what are their titles? Research different types of pharmacies and locations. Plot a bus/walking route. What are items you can get a pharmacy? Over the counter vs prescription? Safety measures with medication
Social/emotional: review why someone would need to take a "chill pill", what does it mean to "chill out". You can review emotions and healthy ways to manage them and express them. I also like to do a mental health toolbox where students learn different ways to manage mental health and then select ideas to build their own coping skills. 
Independent living skills: how do you manage your personal medication? Hygiene is another great topic at this time. How do you open and store medication safely? Use technology to read medication labels. 

A pic of the ECC Chill Pill bottle and a small bottle of hand sanitizer
Now it's important to remind you that you want to have intentional, meaningful instruction so ponder how you will present this and work through material with students. Don't shove all this information into one lesson! The bonus part is the actual chill pills. We used a mix of Skittles and M&Ms. Another bonus ILS is to review favorite snacks, prices, location of these items, etc. Allow students to mix it up and select their own "pill combinations". 

A top view of the bottle with the lid off so you can see the candy inside.
These make great gifts for others. You may have to stuff them with pre-packaged candies for Covid safety but all in all, it will still work. Last but not least, the label lesson! Teach students what is on a prescription label. We had print and then Braille labels for students. Big shout out to my secretary who assembled these ones! She did a great job. Our students loved them. They were part of our back to school for our residential students. 
Would you like the label to make your own? I'm happy to share! Email me at robbin.keating@gmail.com and I'll get you the template. 


Sunday, May 3, 2020

ECC Family Project 2

Image that says ECC Family Project: Make 3 ingredient popsicles
I quite possibly think that this new series is becoming my favorite during this quarantine time. Why? Because I am a mom and I know first-hand how hard it is to manage life! This is a project that kiddos with multiple impairments or typically developing can do with their siblings. 
You only need THREE ingredients and a popsicle mold--easy peasy! I bought these molds in the Dollar Spot at Target awhile back. You can also probably find them at Dollar Tree or order them for a minimal cost. My youngest (she's 6 years old) did the project with minimal support from me. 

a girl smiles and holds a Jell-o box as she mixes ingredients
The other bonus? It wasn't a marathon long project. We were done (including set up, preparation and clean up) in 15 minutes. Boom! The recipe was a find from Pinterest. Here it is: http://poofycheeks.com/2014/06/jell-o-popsicle-recipe/. Now that we have discovered this one, Pinterest has been awesome to find me a dozen more variations. 

a side view of a girl pouring liquid mix into molds
A couple of important notes for maximizing your total Expanded Core learning: 
1. Your child is the one who should be in charge of the set up & clean up (not just the actual cooking). They should pull out the pot for the water, measuring cup, bowl and spoon. This is the part that may take a few extra minutes if they are new to the kitchen scene. Don't do this part with siblings as they tend to be well meaning but give away the answers. Normally I would suggest that your child also buy the Jell-O but we are in a new normal here. Have a quick (seriously--QUICK) discussion on the different flavors of Jell-O if they are new to Jell-O. Talk about the cost (Jell-O and store brand is cheap!).
2. Consider contrast. Notice that I selected dark blue. It is easy to see. If your child has no vision, consider using a tray with all of the ingredients to keep things organized. 
3. If your child has limitations such as multiple impairments, think about how they can actively participate. That's different than being totally independent. Can they hold the box? Open it? Can they stir? You can discuss hot and cold, empty and full concepts easily. Are they very limited with their hands? No worries--go hand-under-hand with them. Not sure how? Watch this super quick and awesome video: https://www.wsdsonline.org/hand-under-hand/ (watch Daniel Makes A Smoothie). 
4. Let them use the stove! The easiest thing you can do on a stove is boil water. Highlight how you know water is boiling without seeing it. You can hear it! 
5. Put your child in charge of cleaning up! That includes wiping down the counter. 

a close up of a girl's hand as she uses a small measuring cup to pour liquid into mold
I have to admit that I was a little nervous about how my little one was going to pour the mix into the containers. I have a small one cup measuring cup. We simply dunked the cup in the mix and then poured it. She did it all by herself. ECC bonus skills: pouring! No vision? No worries! Don't let your child put their finger in (we do discourage it but sometimes you gotta do what you gotta do). Try having them feel the outside of the container while they pour. The water is hot and you can feel it fill up the container. BEFORE they pour have them indicate with their finger where the top of the mold is. This way you know that they know where the top is. 
Freeze for a few hours and enjoy! I didn't add as much sugar as the recipe called for but you can do whatever works for your family. NOTE: for kids with multiple impairments, really play up the temperature aspects of this. There are repeated opportunities to talk about hot and cold. You could easily make a new recipe with a new flavor each week. Once you master these, you can rank up and try the fruit ones with fresh fruit and coconut milk. Go for it! 

Wednesday, April 15, 2020

Expanded Core Family Project

a graphic that gives the tips--text in post
Hi everyone, here is a quick and easy Expanded Core FAMILY activity! Make sunshine cards for patients in the hospital. I got this idea because it dawned on me that people weren't easily able to visit loved ones who are sick. The great thing about the ECC is that sooooo many ideas match ECC skills. Here's a fun and easy way that the whole family can do an activity together that also gives you a ton of ECC learning.
Below is the text from post: 
Get a pack of cards. Tip:  I used some blank cards from Dollar Tree (only 50 cents a card!)
ECC spotlight: 
talk about the price of cards, purpose of cards, location of cards in a store
Research thoughtful messages for cards. Type or print messages for cards.
ECC spotlight: 
use assistive tech to do research for messages. practice typing skills!
Call a local hospital to find out how you can drop off cards.
ECC spotlight: 
research the address of the hospital--discuss landmarks, find out if there is a bus route or careers at a hospital 

an image of lunchbox notes and stickers

We also bought some sticker since we knew that there were some kids who would receive this. We downloaded free lunchbox notes from Pinterest. Note: We put these items into a bag. Our original thought was to put them inside the cards but since we wanted every item to be safe for patients, we put them in a bag with a post-it for hospital staff to put inside cards after they were finished with their quarantine.

an image of a card with the message handwritten in it
 We took our research of get well notes and wrote them in the cards. The message says: Dear Friend, There are times that we need to know that people care about us. This is one of those times and I happen to be one of those people. Hope you feel better soon!
a card standing up with an envelop that says a sunshine card for you
 We know our parents have a lot going on with "the new normal".  Anyway that we can include things for the whole family can help a lot! I hope this gave you some fun ideas!

Monday, January 6, 2020

Ten Tips for Advocacy & Self Love to Carry With You Over the Next Ten Years

“Ten Tips for Advocacy and Self Love To Carry With You Over the Next Ten Years”
Hi everyone! I hope you all had a wonderful holiday surrounded by your family and friends! I know I did! As we approach the end and beginning of a decade, I’ve been thinking a lot about how I’ve grown over the last ten years. And man, have I CHANGED. In 2009-2010 I was in my sophomore year of high school. I was experiencing a lot of challenges with my condition, not just visually, but in every aspect. I was working really hard to navigate my peer relationships, do well in school, balance my life... plus manage my ever fluctuating SOD (septo-optic dysplasia). I’ve written before about the challenges I faced during my teenage years and how that time often felt like it was never going to end...

 BUT IT DID!!! There were still hard moments over the years but since then I have accomplished a lot! I successfully graduated both high school and college within the normal time frame. I have traveled to and spent time living in twelve different states (some more than once), one foreign country, and one tropical island. I worked on over fifty productions both on and off the stage. I got my first white cane and pair of glasses. I danced on the stage at Radio City Music Hall. I climbed three different literal mountains and more figurative mountains than i can name. I got my first professional teaching job. I learned to be independent AND interdependent. I fell in love. And the list keeps going! 

But this is life. It isn’t all sunshine and happiness all of the time. And I would be lying if I said that for all the joy, succsss, and adventure this decade brought me- it’s kind of come full circle. I started the decade in a rough spot and I’m ending it that way too.

But I’m hopeful that just like the past ten years, the next ten will bring so many wonderful opportunities. And as i reflect on the past decade and prepare for the new, I have Ten Tips to share with you to hopefully inspire you to live your best life, advocate for your success, and love yourself a little more in the years ahead! (They are a little long so bare with me!)

  1. Every part of you is something to celebrate. It can be tempting sometimes to try and “hide” your vision impairment. But why?? Everyone has something going on in their life or something about them that makes them unique or special. And yours just happens to be your vision! Embrace it! Once you accept yourself and celebrate all the elements that make you who you are, it will be hard for others not to follow suit!
  2. You are your own worst enemy-not sighted people. It’s easy to feel like because sighted people don’t always understand you that they are against you. This is SO NOT TRUE. Most sighted people just don’t get it initially. But once you explain you’re vision, there is so much opportunity to create a dynamic relationship! Thinking that because they may not understand means they can’t or don’t want to understand you will only do you a disservice. You could miss out on incredible connections, friendships, and opportunities. Don’t let your own insecurities and anxieties about how they may view you get in your way. Which brings me to my next point....
  3. Stop worrying so much! Life is way too short to let anxiety and insecurity rule your daily life. You are so capable and deserve to have every possible experience life has to offer. The only one holding you back from taking those chances and leaps of faith is you! I know it can be scary and anxiety inducing thinking about all of the potential “no”s you will hear or the ones you’ve already heard. But don’t let those rule your world. Find every opportunity to take that “No”and turn it into a “YES”!
  4. It’s okay to not be okay. Sometimes though, despite our best efforts, there are some things we just cannot do. And it’s okay to feel that. It’s okay to be sad about that. Sometimes things happen that are genuinely really awful. The only way to truly move forward is to let yourself feel those sad and bad feelings. Eventually you will grow through it. Eventually you will be able to use that as fuel to persevere. But in the meantime, if you are having trouble moving on.... have a good cry. Eat that pint of Ben and Jerry’s. Call your best friend and vent about it. Allow yourself that time to process so that you can come back stronger than ever.
  5. It’s okay to let go. Sometimes things in our life no longer serve us anymore, or no longer fit in with our plan. Whether it’s moving on from a place, or saying goodbye to a friendship; sometimes holding on to tightly can only do more damage. It’s okay to let go of the things that don’t support you anymore. People grow, circumstances change. And there is nothing wrong with that. Allow yourself the freedom to move forward and maybe leave some things behind.
  6. Asking for help isn’t a bad thing. You are strong. You are capable. You can do anything. But we don’t always feel that way. And in those moments it’s more than acceptable to ask for help and lean on someone else for a minute. Surround yourself with people who lift you up when you feel like you’ve hit rock bottom. And remember that you can do the same for them. That’s what support is all about; being there for each other to help each other through!
  7. Fall down seven times, stand up eight. It’s easy to feel sometimes like you are stuck. When things go wrong, or if you’re feeling down, it can be easy to live in the discouragement. But I firmly believe that if you trust in yourself and the support of those around you, you will find yourself standing taller than ever before. Life knocks us down. And it can be devastating. But the more we fall, each time we end up standing a little taller,  with our head held a little higher. Each time we fall is a chance to learn and grow. It may take us sometime to get ourselves up. It may take us some time to heal. During my hard moments this is the mantra i use to help myself remember how strong I am. And i push myself to get up and keep going. I hope that you can use this phrase to get you through any of the moments where you feel like you can’t stand up anymore- you’ve fallen down seven times. But you will stand up eight!
  8. Create your own way. This phrase has been on my mind so much, especially for the past few months. A friend of mine, Tara Llewelyn, who has had an incredibly successful career as a Broadway dresser is my current inspiration and motivation to live this phrase out. Throughout her time living in New York, Tara has definitely had her share of struggles. But despite any doubts or discouragements, she has risen up and used those moments as fuel to get creative and make something happen for herself. Tara is also a performer, which can be a challenging path. She has had many successful auditions and performed in many pieces in the city. But like every performer, there have been periods where she was said “no” to. And those are the moments in which Tara has truly thrived. She wrote and starred in her own one woman cabaret, “Seams and Songs” which she has revamped and reprised multiple times in venues throughout NYC and Connecticut. Most recently, she wrote, produced, starred in, and is currently working on post production edits of the pilot for her new television series, “Under The Influence”. She is also an avid blogger and always up for an adventure. Watching this friend of mine take life into her own hands has been  amazing and has inspired me to do the same. I’ve been writing more, singing more, and doing my best to use the talents I have to make opportunities! And so moving forward I hope that in moments where you feel stuck or unsure that you too will take life into your own hands and “create your own way”!
  9. You really do only live once. Piggy backing off of that last one, when creating your own way don’t forget to take chances and try the things you’ve always wanted to. Over the past ten years, i have lost too many people. My community back hone lost two little angels who hadn’t even gotten to really experience life yet. I lost my dear teachers (Pam Diana, Ms. Helen, Louise Neistat, John Ayres). I lost a dear friend, LeRoy Walton. I lost three of my loving uncles. I lost my great grandfather. I lost my grandfather. I lost my sweet aunt. As I think back on all of the loss, I am reminded of how precious life is. It really is just too short, and though this phrase has become something rather comical, there is some serious truth to it. You really do only live once. So why waste it? Why waste the time you have waiting for something to happen? Go out there and do it! If there is something you’ve wanted to do but just haven’t gotten around to it or are nervous about it- get up, get out, and go do it! I had been saying for years that i wanted to try sky diving. It had always been in the back of my mind. But I kept telling myself it’s nice to think about but there’s no way I’ll actually do that. Then in 2018, my grandfather passed away. And shortly after that my dad and i were listening to “Live Like You Were Dying” by Tim McGraw. I’ve heard this song before, but this time it was different. I thought about all of the things my grandfather did and didn’t get to do. I wondered if he would have things he wished he had done. And in that moment I decided that I wasn’t going to waste a minute. So you know what I did? Later that year, I went skydiving. So go do it. Go skydiving. Go Rocky Mountain climbing. Love deeper. Speak sweeter. Give forgiveness you’ve been denying. Life is too short not to and you only live once.
  10. Stay Ambitious! The catch phrase of my blog and my mantra for the next decade. I hope that you all never lose your ambition. We all have goals and dreams and the key to achieving them is through pure determination and ambition! Hold on to those dreams and goals. Don’t let bumps in the road scare you from following it still. I urge you all to live ambitiously. Take chances. Say yes. Fail. Try again. Today again, again. Be kind to yourself. Let yourself feel. Let things go. Fall down seven times. Stand up eight. Create your own way. Live ambitiously because you only have one life to do so! Use your ambition to turn the things you wish you did into the things you DID! Adventure is out there.... no go and get it!

Thanks for reading, friends! I wish you all so much love and happiness in the new year that I hope stays with you throughout the decade! Cheers to ten new years to chase your dreams, achieve those goals, and create the best and most exciting life for yourself! Your vision may not be 20/20, but that doesn’t mean 2020 can’t be the year to find your vision for life!

Stay Ambitious,
Frankie Ann

Sunday, December 15, 2019

“Vision Statements: How Do You Explain Your Vision Impairment to Someone Who is Sighted or Just Doesn’t Get it?”

graphic that says Hi everyone! Today, I’m going to be talking about something that I’ve spent the past twenty-plus years trying to navigate. It’s something that I’m constantly updating, editing and reworking. It’s what i like to call my “vision statement” or my first step to advocacy. A vision statement is the basic explanation of my vision impairment to someone who may not fully understand. Once I started using a vision statement to help me explain my vision impairment to others, I felt my confidence and comfortability in talking about it growing tremendously. It became easier to stand with pride and talk about my vision, and help others to understand this important part of me!  The idea of legal blindness is hard for people to comprehend because in a lot of ways it is a grey area. There are some things I can see, some things I can’t and for those who aren’t familiar with it, that can be super confusing. What made it even more confusing is when they asked me about my vision, I started throwing medical terms at them that I had studied and made sense to me, but to them it sounded like a foreign language.  So how do you do it? How do you help the sighted people in your life to grasp what your vision impairment means and what it consists of without making it awkward and uncomfortable for both you and them? I’ve come up with five steps to create a clear and concise Vision Statement to share with those in your life who don’t quite get it, but desperately want to!  1. Keep it short. The only thing more awkward than you not knowing what to say when asked about your vision, is if you talk FOREVER about your vision. People want to understand but again- the more language you use, the more “formal” you make the initial conversation, the more confusing it can be. Keep it short and sweet: three-five sentences that capture the most essential parts of your vision impairment! And then if they have questions or want to keep talking, that’s great, but the clearer and more concise you can make it the easier it is for them to initially understand.  2. Show them! In my first sentence of my vision statement, I ask people to put on “binoculars”. I do this to show them what tunnel vision is. This helps them to really visualize what it is you’re talking about and makes the conversation more dynamic. If this is a person who is less familiar to you, i would demonstrate the binoculars myself and say “well my vision is kind of like if you put your hands to your face as if you were pretending to look through binoculars.” By doing it myself, that sometimes prompts the other person to do it too! And it becomes a more interesting way for them to experience an aspect of what my vision is like.  3. Pick an analogy that sighted people might easily be able to understand. I will never forget the first time my dad explained to me the difference between High Definition and standard television. The way he talked about the difference in quality of the image reminded me so much of what it sounded like to me when sighted people described their vision. I thought of how for me, the outlines of people and objects are usually ill defined or blurred together. And i imagine for sighted people that isn’t the case. So now after asking them to put their binoculars on, I say “you know how when you’re watching tv, and you change the channel from a standard definition station to HD? Well let’s just say my vision is standard definition- kind of fuzzy/blurry not super defined. And yours is HD!”  4. Simple facts are your friend! Next, i list three things about my vision that are super simple and could be written out in bullet point format. For example.... •I have night blindness. •I have no depth perception. •I read large print and sometimes use a cane. I picked these three because these are the ones that would most pertain to my relationship with the sighted person. Because of my night blindness i might need their help to guide me in the dark. Because of my poor depth perception i might need them to let me know if there is a car coming when i go to cross the street. And lastly, it’s important to identify if your a print reader or cane user because that helps them to understand an aspect of what you can see! It’s tangible and something that is easier for others to get.  5. Let them ask questions! Often times after I’ve given my vision statement, i can tell people are still curious and have more questions. So I’ll sometimes say “is there anything you want to ask me?” Or “if you want to ask a question that’s okay! If not that’s cool too... let’s get some ice cream!” Just let yourself be comfortable in your own skin. This isn’t something to be ashamed of or intimidated by. Your vision impairment is a part of you. And though the sighted people in your life may not totally understand, they care about you and want to do what they can to support you and also to try their best to understand you. But in order to do so, you have to let them in a little bit.   And that’s that! I hope this was helpful! Next week, I’ll be talking a little bit more about vision statements but on a more professional level: “How Do I Communicate My Vision Impairment in an Interview or Professional Setting?” Until then, i hope you all have a great week! If you have any questions about these tips please feel free to leave them in the comments! I’ll be sure to respond! Thanks for reading!  Stay Ambitious, Frankie Ann
Hi everyone! Today, I’m going to be talking about something that I’ve spent the past twenty-plus years trying to navigate. It’s something that I’m constantly updating, editing and reworking. It’s what i like to call my “vision statement” or my first step to advocacy. A vision statement is the basic explanation of my vision impairment to someone who may not fully understand. Once I started using a vision statement to help me explain my vision impairment to others, I felt my confidence and comfortability in talking about it growing tremendously. It became easier to stand with pride and talk about my vision, and help others to understand this important part of me!

The idea of legal blindness is hard for people to comprehend because in a lot of ways it is a grey area. There are some things I can see, some things I can’t and for those who aren’t familiar with it, that can be super confusing. What made it even more confusing is when they asked me about my vision, I started throwing medical terms at them that I had studied and made sense to me, but to them it sounded like a foreign language.

So how do you do it? How do you help the sighted people in your life to grasp what your vision impairment means and what it consists of without making it awkward and uncomfortable for both you and them? I’ve come up with five steps to create a clear and concise Vision Statement to share with those in your life who don’t quite get it, but desperately want to!

1. Keep it short. The only thing more awkward than you not knowing what to say when asked about your vision, is if you talk FOREVER about your vision. People want to understand but again- the more language you use, the more “formal” you make the initial conversation, the more confusing it can be. Keep it short and sweet: three-five sentences that capture the most essential parts of your vision impairment! And then if they have questions or want to keep talking, that’s great, but the clearer and more concise you can make it the easier it is for them to initially understand.

2. Show them! In my first sentence of my vision statement, I ask people to put on “binoculars”. I do this to show them what tunnel vision is. This helps them to really visualize what it is you’re talking about and makes the conversation more dynamic. If this is a person who is less familiar to you, i would demonstrate the binoculars myself and say “well my vision is kind of like if you put your hands to your face as if you were pretending to look through binoculars.” By doing it myself, that sometimes prompts the other person to do it too! And it becomes a more interesting way for them to experience an aspect of what my vision is like.

3. Pick an analogy that sighted people might easily be able to understand. I will never forget the first time my dad explained to me the difference between High Definition and standard television. The way he talked about the difference in quality of the image reminded me so much of what it sounded like to me when sighted people described their vision. I thought of how for me, the outlines of people and objects are usually ill defined or blurred together. And i imagine for sighted people that isn’t the case. So now after asking them to put their binoculars on, I say “you know how when you’re watching tv, and you change the channel from a standard definition station to HD? Well let’s just say my vision is standard definition- kind of fuzzy/blurry not super defined. And yours is HD!”

4. Simple facts are your friend! Next, i list three things about my vision that are super simple and could be written out in bullet point format. For example.... 
•I have night blindness. 
•I have no depth perception. 
•I read large print and sometimes use a cane. I picked these three because these are the ones that would most pertain to my relationship with the sighted person. Because of my night blindness i might need their help to guide me in the dark. Because of my poor depth perception i might need them to let me know if there is a car coming when i go to cross the street. And lastly, it’s important to identify if you're a print reader or cane user because that helps them to understand an aspect of what you can see! It’s tangible and something that is easier for others to get.

5. Let them ask questions! Often times after I’ve given my vision statement, i can tell people are still curious and have more questions. So I’ll sometimes say “is there anything you want to ask me?” Or “if you want to ask a question that’s okay! If not that’s cool too... let’s get some ice cream!” Just let yourself be comfortable in your own skin. This isn’t something to be ashamed of or intimidated by. Your vision impairment is a part of you. And though the sighted people in your life may not totally understand, they care about you and want to do what they can to support you and also to try their best to understand you. But in order to do so, you have to let them in a little bit. 

And that’s that! I hope this was helpful! Next week, I’ll be talking a little bit more about vision statements but on a more professional level: “How Do I Communicate My Vision Impairment in an Interview or Professional Setting?” Until then, i hope you all have a great week! If you have any questions about these tips please feel free to leave them in the comments! I’ll be sure to respond! Thanks for reading!

Stay Ambitious,
Frankie Ann


Wednesday, December 11, 2019

Your New Favorite Read: Blind Ambitition

A turquoise and purple logo that says Blind Ambition with Braille and Large Print font

Hi everyone! My name is Frankie Ann and I am a legally blind, twenty-something who is just trying to live her best blind life! And this is Blind Ambition- a weekly blog column where I will be sharing Accessibility Tips, Expanded Core Curriculum Hacks, Skills for Advocacy, Personal successes, struggles, and so much more!

Here’s a little bit about me! I was born with septo-optic dysplasia which is a really fancy way to say that my optic nerves are underdeveloped. I have poor distance vision (20/400 in my left eye and 20/800 in my right) no peripheral vision (tunnel vision), no depth perception, severe light sensitivity, degrees of night blindness, slight nystagmus, and a partial astigmatism. Mix that all together and you get me: a large print reader (24 print Arial bold font for the win) and partial cane user (at night and in excessively crowded or unfamiliar environments) who has spent her life trying her best to adapt to every situation that comes her way and never back down from a challenge!

I met Robbin back in 2010. At the time, i was going through a serious hard time coping with my vision impairment. I was just about to turn sixteen and while all of my other friends were getting hyped up to get their driver’s licenses, I got my very first white cane and was taking street crossing classes with my Orientation and Mobility instructor.  I felt totally lost, insecure, and frankly embarrassed by my vision impairment. But Robbin helped me to see past all that- both literally and figuratively! She taught me that it’s not about what I could see, but about what I could do. Once that seed was planted, everything changed!

Frankie Ann skydiving with a guide on her back in the air.


an image of Frankie Ann using a rope to pull herself up on a mountain

Though my final high school and college years had their fair share of challenges and hard times, i was equipped with a new found confidence and pride in my self that helped me to rise above and keep pushing through. That confidence helped me to make the decision to leave my home in Connecticut and move to the biggest, busiest, and most visually overstimulating city in the country- New York City! My hope is that by sharing my experiences here, I may be able to help other blind/visually impaired individuals work through their own struggles, find solutions to their challenges, learn that they are DEFINITELY not alone, and chase their dreams!

I am so excited to be launching Blind Ambition! Each week will cover an aspect of living life with a vision impairment. Stay tuned next week for our first topic: “Vision Statements: How Do You Explain Your Vision Impairment to Someone who is Sighted or Just Doesn’t Get It?” In the meantime, follow my Instagram @blindambitionblog for daily posts about Accessibility, Advocacy, and more!

Thanks for reading! I can’t wait to keep sharing with you!

Stay Ambitious,
Frankie Ann

Thursday, July 25, 2019

Teach the ECC Using a Hoverboard

a graphic that says "teach the expanded core using a hoverboard"
Teach the Expanded Core using a.....hoverboard? YES! A hoverboard!! Why? How? Huh? Let me start at the beginning. I spent a few weeks mulling over the activities for STEM Camp. I already knew the theme (STEM Camp in the Old Pioneer West) but needed to do my research for other activities. I look for STEM activities that are popular with all kids. I want to keep our students looped in with what their peers are liking. I walked passed a hoverboard while buying some supplies and instantly made a U turn. I was going back for the hoverboard. I had an idea! 

a female student kneels down and checks out a hoverboard
I knew that it would be a total blast to teach my students how to use a hoverboard at STEM Camp. I loved this idea not just because I thought it would be cool but because my ECC lightbulb went off. There were so many things I could teach to build an awesome ECC experience! It was just hoverboards that I purchased, I rounded up different types of helmets, photos and pieces for location and got to work. 
the group of students sit with the teacher on the floor with their legs extended

Before we even got on the hoverboards, we needed to do some serious concept development, STEM instruction and pre-teaching. First, I set the stage and we discussed what everyone knew about hoverboards and all things related to them (helmets, locations, etc). 
Then we get to the STEM of it all. We talked about the parts of the hoverboard, the science of it and how they work. This was a bonus because I could teach STEM and the ECC at the same time. Students learned where to place their feet, how wide the foot pad sensors are and positioning. We sat on the floor and extended our legs to practice tipping our toes and working our heels. I bought different types of helmets on purpose to discuss the features, uses, etc. of the helmets. 

a female student wearing a fun helmet sits on the ground and checks out the hoverboard
Can you see all of the attention I'm giving to the details? Too many times I see teachers just pass the object to a students a move on. I purposely gave students a variety of helmets and bought different brands/types of hoverboards. I wanted them to get a rich experience and concept development. 

a female student sits on the ground and checks out the hoverboard
Can you see how many areas of the ECC we are hitting? I was so excited throughout our initial hoverboard lesson because it was like an ECC buffet! We hit lots of orientation and mobility--from spatial awareness to directionality and balance. (Once students got their balance, we did have them use their canes if they were a cane user). We even hit career education. How? We discussed the rules and earning your dues at the skate park. We also discussed what types of jobs you could have in the skate industry. 
students stand on the hoverboard with teachers standing in front of them holding their hands
Let me share some of my instruction progression on how we taught the hoverboard. Most important, use a chair to get on and off! The very first thing we did was just simply having students stand up, balance and then sit down. Once they could stand up and maintain their balance, I knew they were ready to move on. Students must wear a helmet at all times. 
Students then learned how to move forward and backwards. This was great because they learned a lot about body awareness and control. Each student had an adult staff in close proximity. I also had a teenager who had typical vision there to model, support and talk with students about her experience.

a female student moves forward on a hoverboard
It took all of the students about one full day of hoverboard practicing to grow to mastering it. Everyone, students with low vision to no vision were rocking their skills on the hoverboards! It was awesome to watch my students with no vision cruising along with their canes. They just adjusted their speed and coordinated with their canes to find their way up and down our hallways. 
a male teenager moves on the hoverboard and uses his cane
The next time you are looking for a fun ECC lesson, consider a lesson with a hoverboard! I bought my boards from Walmart. (I actually price matched walmart.com and got an even better price). I purposely bought different boards to compare and contrast. I even bought one with a bluetooth speaker built in!
a male teenager moves on the hoverboard and uses his cane
Another bonus: the confidence that all of our students gained by mastering the hoverboard! Yaaaassss! They learned the physics behind the hoverboard. They were fearless with gaining speed and fluidity. It was just an ECC party with students learning skills a lot of people probably don't think blind kids can do! It's not about what we see, it's about what we do! 


Thursday, May 23, 2019

Teach the Expanded Core Using the Play Impossible Gameball

Graphic that says Teach the Expanded Core Curriculum using the Play Impossible Gameball
I am so excited to share my new favorite Expanded Core activity: the Play Impossible Gameball! Have you tried it yet? I learned about it while at the Apple Store with an employee. I was instantly intrigued with its potential but worried about accessibility. There are so many fun new STEM ideas coming out but their apps are not accessible. Not the case with Play Impossible Gameball! 
There is a ton of potential with the gameball. I use it for STEM but of course can teach loads of other ECC skills. NOTE: take time to go through the app before you let students play with it. Consider all of the things you need to preteach. 

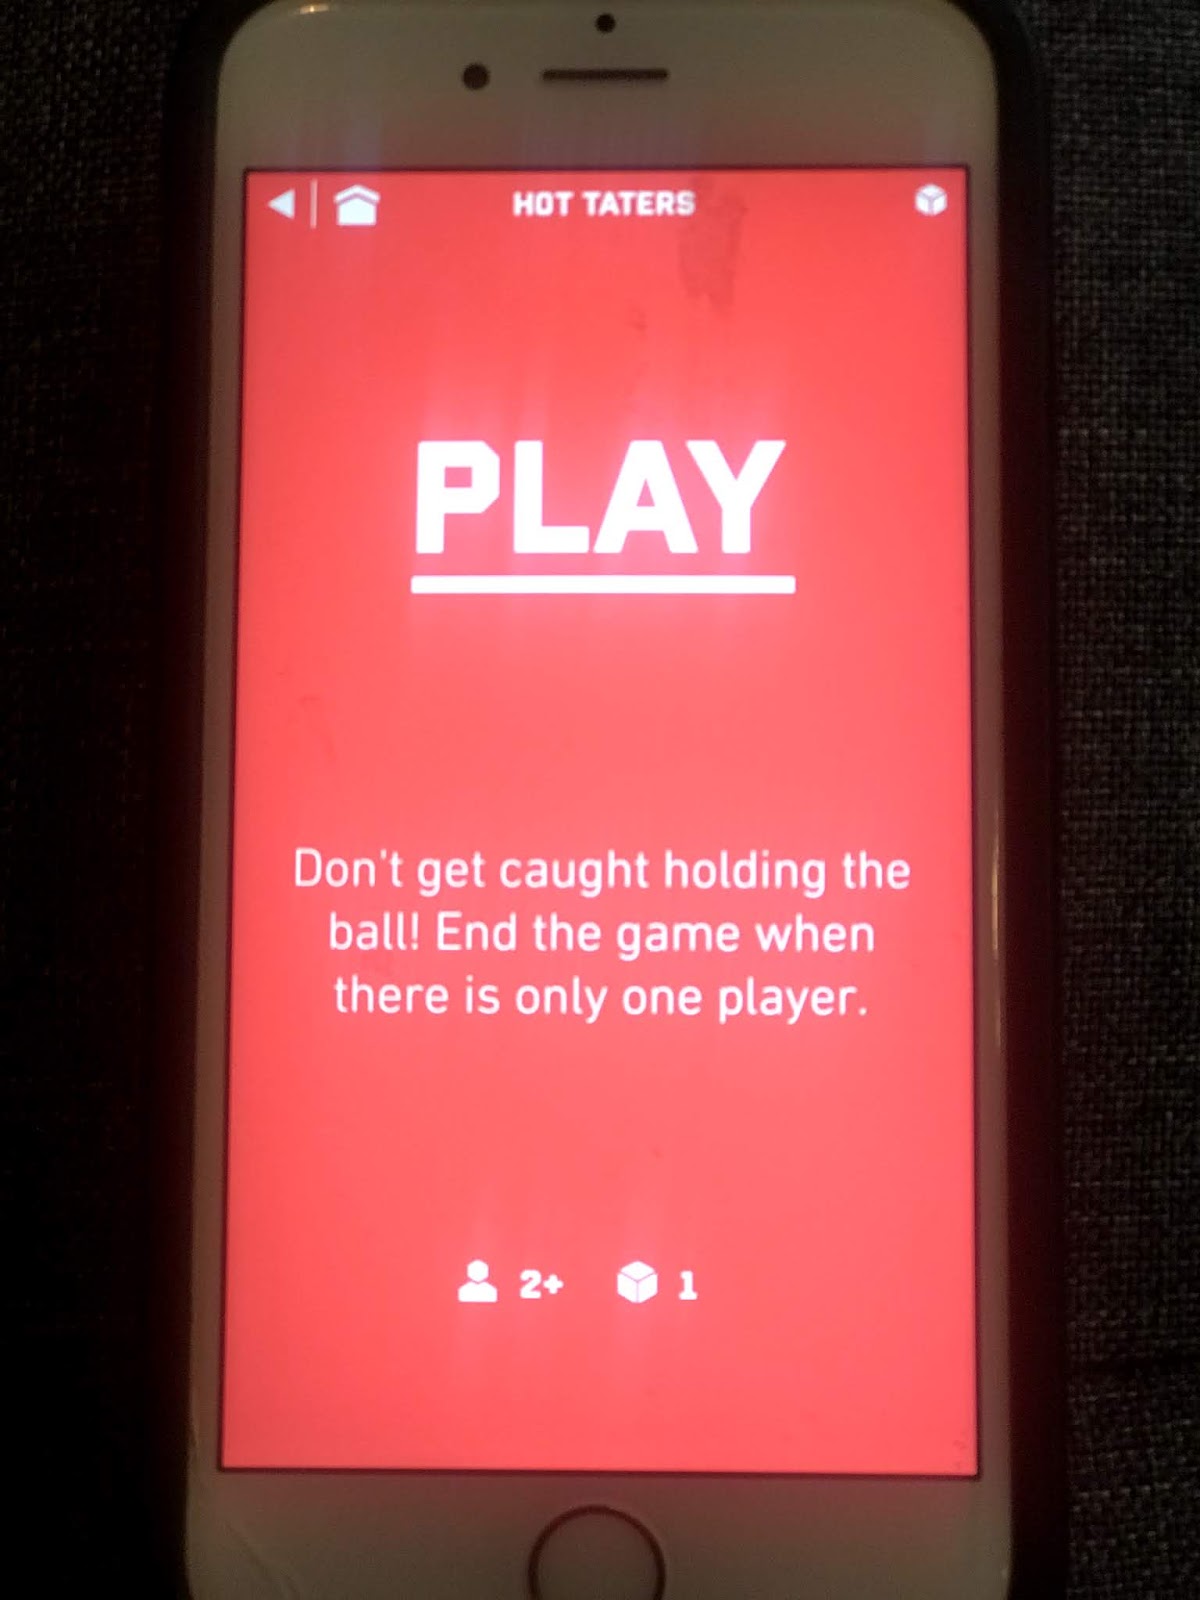
A photo of the Game possible screen app that shows the list of all the games.

The app allows you to play with just one player or in teams. You can play with one ball or two balls. The balls charge super fast! You can purchase them in a few places but I bought on Amazon. They are about $80 per ball. Kinda pricey but worth it! 
Check out general information on their site: https://www.playimpossible.com

Screen of the app that says "play" with the directions for a game.
The ball is fun to play for just recreation and leisure skills. I tested out the app and its accessibility with our assistive technology teacher (who is completely blind) and our education tech guy. You can see how they did on Instagram. Follow me on 9MoreThanCore on Instagram to see the demo!

Screen of the app that says "play" with the directions for a game.
The app speaks about 80% of the information. It does not work with VoiceOver. Our AT guy, Quintin, who tested it with me was able to play almost completely independently. This is where you as the teacher or parent needs to play with the app first. You may need to teach or strengthen skills such as toss a ball in the air and catch the ball. 

screen of the app with the directions to select the metric unit you want to hear
I really like that students can play this with their friends and family without much effort. It allows our students to participate along side peers and have a lot of fun! There are some skills that I really recommend you preteach with students such as the tossing ones (if your student has no vision).  This is important because tossing ball is easy for sighted people but can be a real hiccup for our students.  Think about the social implications and needs for our students. 

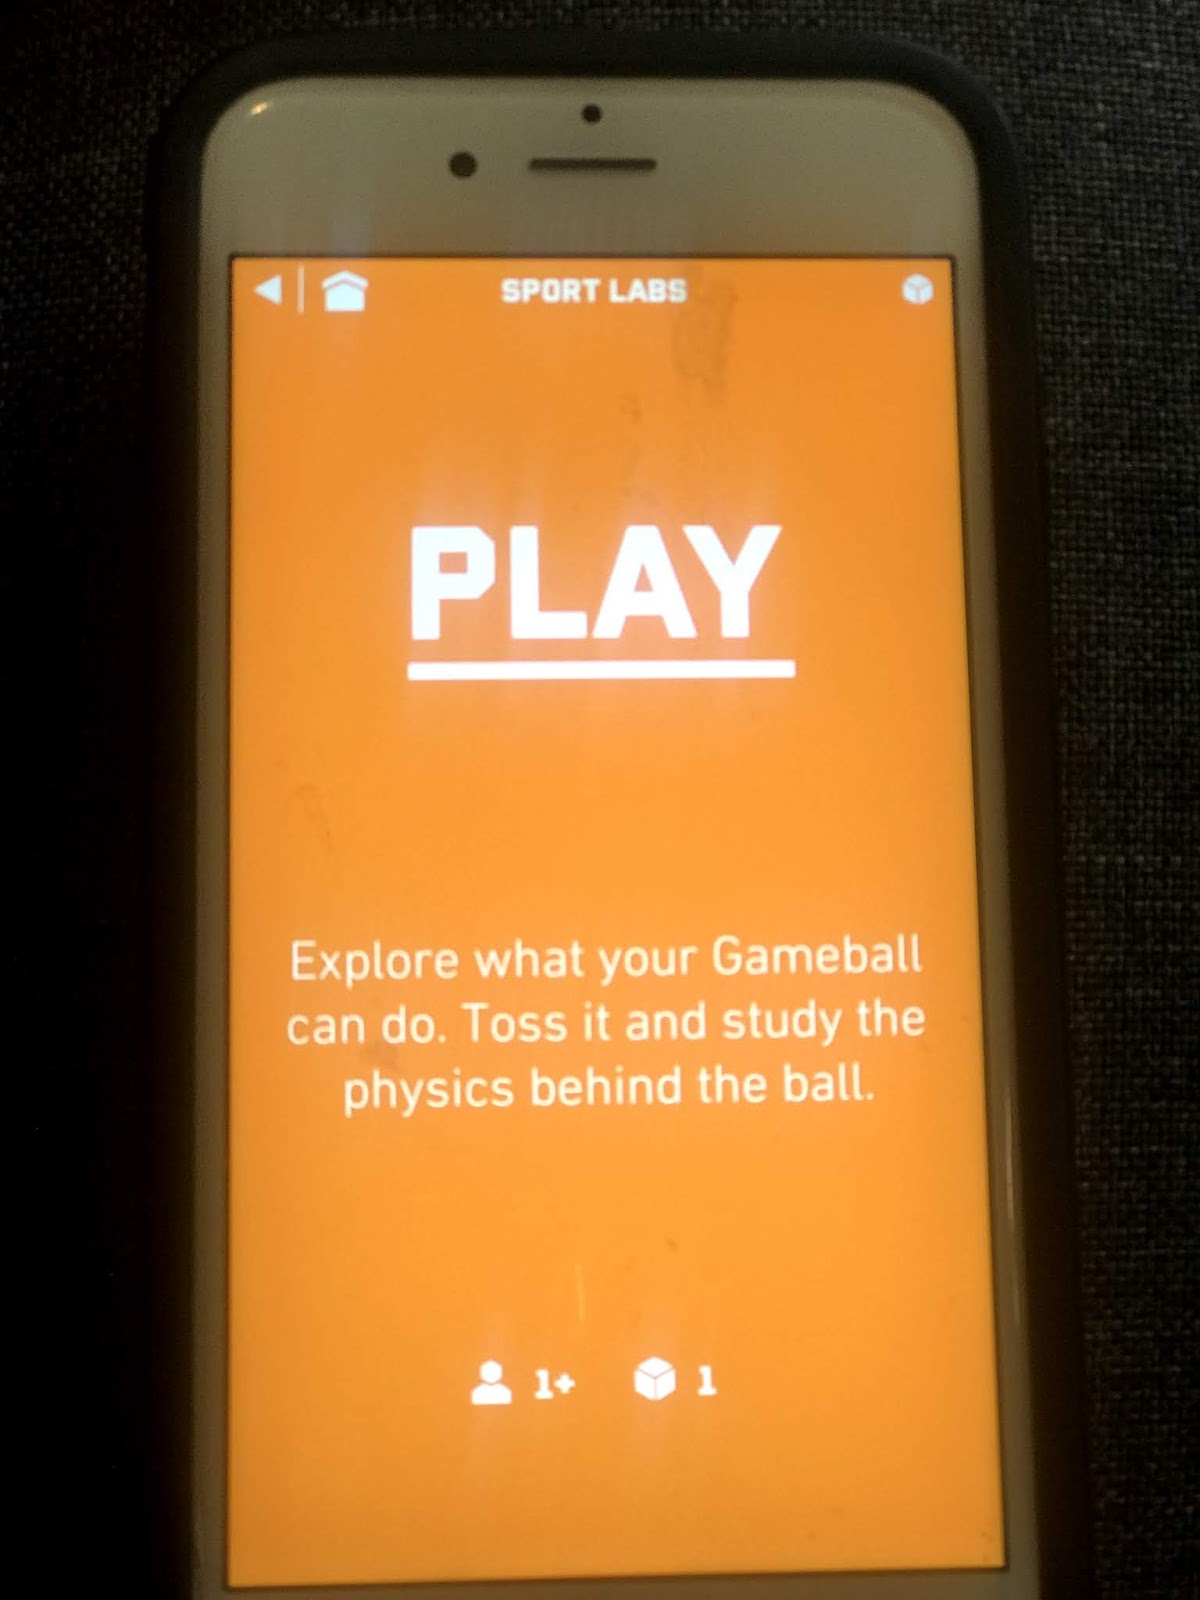
screen of the app  from the sports labs activity with the stats of throwing, speed

Can you see all the areas and skills of the Expanded Core you can teach using the gameball? Recreation and leisure is definitely a win! I've even explored games that my students with multiple impairments can play with peers. Social skills is another main area. You can also infuse skills from self-determination, use of assistive technology and compensatory access skills. 

Monday, April 1, 2019

Teach Coding with the Expanded Core!

Teach Coding Using the Expanded Core Curriculum graphic
I have been loving teaching STEM as part of my Expanded Core instruction. There are so many areas where you can overlap both and have meaningful instruction. Coding can be difficult for students with vision impairments. There are some new things coming out to help with this but in the meantime, what do we do? Coding is often not accessible because most assistive technology readers are for text recognition. Coding programs are often object recognition and not accessible with screen readers. I did a lot of research about how we can still teach the foundations of coding. There are a ton of good ideas with teaching offline coding. Offline coding teaches the principles of coding without using a computer. It's not completely ideal (since we do want to teach all of coding for our students) but it does have a lot of ECC benefits. 

The offline coding cards are scattered on a table.
You can buy a variety of different offline coding activities from sites like Teachers Pay Teachers (I love that site!!). I have a new robotics unit that I developed and coding or programming is the foundation skillset. I needed to make sure that these skills were solid before applying them to the actual robots. Many of the lesson plans that I could purchase weren't super accessible. The main problems were too cutsy fonts that weren't easily read by students. I decided to research and learn about making my own coding cards. See the pictures above and below for what I made. I used a nice clear font with contrast in specific places. I also organized them with the same layout--meaning that there is an object or logo on top (so that students can learn to read or code by object), the directions (turn left/right, go straight, etc.). Last, there is a square box and that is where we use mini post it notes to indicate the number (i.e. spin around 4 times, repeat 2 times, etc.). We laminated them. I'll admit that I was nervous about using traditional laminate. I almost used the non-glare laminate. My students ended up being good with traditional laminate but always consider that when laminating. Then my best para in the world made all the Braille labels for me. 

Offline coding cards are scattered on a table

The first half of my lesson is all about teaching what writing a good program means. I include how specific their line of code has to be. Then we discuss each card so that everyone is on the same page with instruction. I have the students stand up and do this. Everyone turns right, left, goes straight, etc. so that they can perform the task exactly. You will get great ideas from STEM teacher blogs about their ideas with teaching this. I put my ECC hat on because I knew that I was working some good OM skills with this. I made sure the students could execute a 90 degree turn or 180 degree turn with good foot placement. You can do this for typically developing students and for students that have additional disabilities. For students who need more basic lesson plans, we stick to following the directions from the line of code. My typical students continue to more complex coding and I include if/then situations for them. 

An image of a students hands reading the Braille labels on the coding cards
This is a great team building project too. Now I can incorporate other ECC areas in this as the students work to program lines of code for each other to follow. They have to work together to make sure that the student does exactly what the line says. They problem solve and inspect their own work. Once they get a good feel for it, they program  for me. They have the challenge to get me from a designated point one to a point two with an obstacle. I do exactly what they say. They have to get me from a chair on one side of the room to the door. We use tactile maps and other supports as we put together a line of code to make this happen. Are you getting ideas on how you can infuse ECC skills?? I have students write me a line of code to get a backpack from a locker, go into the kitchen and get a snack, etc. You can do so much more than orientation & mobility with this AND you are teaching STEM! Want a set of my offline coding cards? Send me an email and I'm happy to share (FREEBIE!!). You just have to do your own Braille ;)

A female student arranges the cards into a line of code
STEM & the Expanded Core are a great mashup of learning. So many opportunities for our students!

Friday, March 29, 2019

Flipgrid + ECC =Success!


Image graphic that says Teach the ECC using Flipgrid

Have you heard of Flipgrid? Before I can tell you why it's so awesome, let me explain what it is.
From the website: Flipgrid is the leading video discussion platform for millions of PreK to PhD educators, students, and families in 180+ countries. Teachers set up "grids" which are topics. Teachers post questions or topics and students comment on them individually with their own video. General education loves using Flipgrid. I'm always thankful for our education technology specialist who keeps me in the loop of these things. We tested it with our AT specialist and realized that Flipgrid is very accessible (especially on Apple products with VoiceOver). Now that I understood what Flipgrid was, I knew I could use it teach the Expanded Core! The first thing I do is head to my ECC assessment tools and start making a list of EVALS skills. This helps me infuse skills into lesson plans. I always write lesson plans so I can focus on what my objective, procedure, ECC skills and instruction cues will be.

How can you use Flipgrid to teach the Expanded Core? 
This is an awesome idea for itinerant teachers. It allows me to do a lot of teaching remotely. I can post topics/questions/assignments and then students can respond to them. I use it in a variety of ways. Flipgrid is very helpful because it allows me to teach students who live close and students far. I currently have students that live 2 to 4 hours away from me. Important: you can't teach everything from the ECC on Flipgrid. But you can teach a lot of things! In fact, simply using Flipgrid is an ECC lesson because it alone has ECC skills. I love when I hear my students using VO when starting their videos. 

 I've included some screenshots. Below you will see my homepage with 3 of my most current "grids" (or topics). I use them in a variety of my classes. Currently I have 3 live grids: Study Abroad Canada, Accessible Arts Academy and Expanded Core.

Screen shot of Flipgrid screen with 3 grids on it.

Screenshot of the topic details page in Flipgrid

I post a variety of topics each class. This allows you to encourage students to "field trips". I assign students to do certain tasks and then video their responses. Don't just limit it to you (as the teacher) posting assignments. For my Study Abroad Class, I have a few students who are leading the discussions and posting topics. As the teacher, you can grade, provide feedback, etc. to students. I even invite guest teachers to join me and help teach. 

Screenshot of videos list posted by students.
It's hard to coordinate your schedule and student's schedules but Flipgrid allows you to (almost) have an authentic conversation on your own time. I post my topic/assignment/lecture thought and then I give a deadline for my students to reply. I also love that Flipgrid connects students. They don't have to be in the same place to interact with each other. They can reply directly to other's videos. It's a great way for students to get to know others. I also have my mentors join me as guest teachers (or called "co-pilots" on Flipgrid). 


Another feature that I like is that this mainstream general education. My students are using the same educational technology that their peers in their own school are using. They learn to upload videos, links, etc. and develop their tech skills. You can also use Flipgrid for PLCs!

Screenshot of a video Flipgrid page with a teacher making a funny face.
I've used Flipgrid for discussions, assignments, quizzes and even field trips! Sometimes I take my students on a "field trip" somewhere and video where I am or I have them take me on a field trip to show me how they would access a location. There is a time limit for a maximum of 5 minutes per video. I like that because it allows me to give direct feedback on a particular skill. They may have multiple videos that go with that skill and they can upload as many as they want for the assignment. I can give direct feedback to each video. 
We have a lot of fun taking the "selfie" for each video. We always end our videos and take pictures with a funny face. It's a fun tradition that we have in our Flipgrid discussions. I love how effective I can be utilizing this tool. There are so many ideas floating around on how general education teachers are using Flipgrid. I check out YouTube and other EdTEch sites to get ideas because I want to align how I use it with general ed. It allows me to teach my students to use Flipgrid like their sighted peers. 
Here's a tutorial on using Flipgrid:
My last idea for using Flipgrid: use it with your parents! As teachers, we have a special responsibility to teach our parents about the Expanded Core. Use Flipgrid to connect to your parents. You can take videos of their children doing lessons with you or to share bits about the ECC. It's vey easy for parents to learn, too! I'd love to hear how you use it for your ECC lessons.  I'll keep posting my ideas, too!