Showing posts with label Calendar Box. Show all posts

Friday, December 1, 2017

Teach ECC Using a Daily School Schedule


Hi friends! I wanted to share an easy way to teach the Expanded Core Curriculum: use the daily school schedule! This gem of an idea comes from our talented preschool teacher, Sandra. I was visiting her classroom and saw her fantastic display. I saw her daily schedule and immediately started seeing ECC areas popping out everywhere!
[Picture #1 description: a daily schedule in the formation of two Braille cells. Each dot position has a print and object to represent a part of the day. ]

Check out the close up pictures of the Braille cell formation schedule.  Each dot position has a tactile object, large print and Braille. 


This daily schedule chart is oozing preschool to early elementary ECC concepts! Don't think that this is just a daily schedule. It is an easy way to embed ECC instruction.
 Here's just a quick overview of ECC areas that are covered by this schedule:
compensatory skill areas (more than just the Braille formation, think about concept development, organization, etc.)
career education (following a schedule, the chore chart, etc.)
ILS (time management, responding to the cue with the appropriate action)
orientation & mobility (spatial skills development; knowing the location of the center or activity)
recreation & leisure (following rules--you have to know how to follow rules when playing or participating in a recreation activity)
social interaction skills: the social discussion of what is happening during the day, turn taking)
self-determination (identifying what they can participate in; seeing how they are part of activities)
assistive technology (students can use low tech devices and pre-concept techniques for accessing information)
sensory efficiency (using all senses for concept development. I also want to point out the contrast that Sandra used. It is not a visually complex schedule for students to look at.)


Check out the accompanying chore chart. Chore charts are not unusual in classrooms. This teaches career education. I always want to encourage teachers to use chore charts and assign meaningful chores for students to do. This helps with concept development and foundation career skills. 

I love sharing easy ways where ECC skills occur naturally. That's the key to ECC instruction: find routines where ECC skills naturally occur or are naturally embedded. Hope this makes you think twice about using a daily school schedule!


Friday, July 29, 2016

Communication Desk for Students with Multiple Impairments


It's almost time to get back to school! If you are a teacher of a student with a multiple impairment including deafblindness or blindness, you need to read this!!
Communication is at the very top of my priority list when it comes to being a teacher. Our kiddos need consistent opportunities for expressive and receptive communication. The second priority on my instruction list is creating defined spaces. Defined spaces allow our students to be anchored in space/environment/body and then sets the framework for anticipation.  

If you are unsure on how to use a calendar box system, read these articles:

The student communication desk idea follows tactual symbols/calendar box system strategy and using a defines space. The students that use these desks that are pictures are those with multiple impairments or show Autistic like behaviors and have significant vision impairments. All of the students are non-verbal. 

The teacher has done a terrific job of implementing tactual/object symbols for instruction. She was stumped because using a traditional finished box was not working. We needed to find a solution that would help students establish that a concept/lesson/symbol was finished but wouldn't fly away (if thrown) and was unique enough that they could comprehend "finished". 
Solution: The object symbols (routine for the day) are laid out across on top. The blue or red felt area that is perpendicular is the finished area. Notice that it is a defined area that is unique. It is a clearly defined finished area. Students place finished symbols on the felt area. These two areas teach spatial awareness (across and top/bottom), literacy (left to right, reading symbols) and self determination (students make choices and can communicate based on the location of the symbols) and communication. 


The student communication desk also teaches compensatory skills including communication and reading their name by tactually identifying their desk (notice the symbol placed at the bottom right of the desk and on their chair). 

Their academic piece as well as any career ed/work for reward also follows a consistent communication system. Notice the discreet trial training boards (penny boards) that have each students' unique symbol. 

Note: We placed their boards and binders on the desk for the purpose of this picture. All of these items may be on the desk at one time depending on activity. It is important to note that each of these items have a specific and consistent placement for students. 


I can't reiterate enough that knowledge is key for using the communication desk idea. You must have knowledge of calendar box systems, creating tactual symbols and communication strategies. There are some terrific articles out there about incorporating, implementing and standardizing tactual symbols for students with vision impairments. Here is one that I really like from Paths to Literacy.
The tactual symbols pictured were created from the APH Tactile Connections Kit. It's a quality kit that can be purchased on quota funds via APH. Make sure you have a quality hot glue gun and hook & loop (Velcro, too!). Always remember that symbols should be easy to replicate (always save extra fabric or duplicates of object). Symbols can be eaten, slobbered on and tossed in a heartbeat. 


I love this desk idea especially for our nonverbal students that do not use a complex communication system. You can build on these symbols and concepts. I love that this teacher uses consistency for the students. And yes, it does implement Expanded Core Curriculum objectives!!

Thursday, November 12, 2015

New Must Have Trays!


Dollar Tree logo

Hello friends! 
I was out on my usual rounds at Dollar Tree buying some calendar object and finished baskets when creativity hit me. I have already blogged about how to use a variety of baskets for sorting, sequencing, calendar box systems and finished boxes. Check out my older posts if you want a review of using these boxes.

Dollar Store trays for teaching blind kids
This Dollar Store tray is perfect for teaching sorting skills for blind kids 

I found five other trays that you have to go buy RIGHT NOW! Once Dollar Tree sells out, they can be gone forever especially with the holidays right around the corner. Stock up!

Above (black tray): Of course this is a great sorting tray! You could also do a little sequencing with it, too. The sequence can be following a clock face or just up/down or left/right. Lots of possibilities!

Below (red tray): I saw this one and was intrigued with what we could actually do with it. I thought you might able to use sequencing or sorting with cups. The three rows are really cool because you can use a top, middle and bottom sequence. You can flip it over, add velcro to the circles (in the middle of circle) and you can sequence that way, too.  These are just starter ideas. The sky is the limit!

Dollar Store trays for teaching blind kids
This Dollar Store tray teaching sequencing skills for kids who are blind
Below (red square tray): I loved this tray because I thought this would be nice to use with velcro. You could do some matching with it. The velcro would serve as a place holder.  I also liked the unique "walls" on this tray. The sides are unique to use. Lastly, I liked this tray because it is a square and not a rectangle. They are smaller in size than most trays as well. 


Above (silver tray top): The first thing to remember about this and all Dollar Store trays is that they aren't always make of thick durable material. That doesn't mean you shouldn't buy them. It just means that you should plenty for replacement and/or have reinforcements.  This silver tray is a tray top that I found in the baking tin section. I loved this tray top because of its color and the texture! How fun is this tray!? This is the kind of tray that you could just use alone--no texture, no sequence or anything. Just fun to use!

Below (red tray): This was also found in the backing section. The red is actually just an insert. It is very thin plastic but has potential nonetheless. This tray is a nice size. I like it for putting 1-2 simple items in for discovery or using it for sensory items. But then again, these are all just starter ideas! Have fun and be inventive!!

ps--I found these trays on Tuesday, November 10th. Hit up several Dollar Trees to complete your collection (that's what I like to do!)


Monday, April 6, 2015

Add this to your calendar box tool box!

Hi friends, happy spring! I am happy to share this product and encourage you to add it to your teacher resource toolbox. This is a great find for making calendar box items. I found out about this awesome find while visiting our preschool classroom and the teacher, Tammy. Are you still wondering what this great product is? See picture below for the name and what the box look like. This high gloss finish protects and preserves items. I found it on Amazon for about $65 plus tax (a large bottle of it). I found the one pictured below for $14.99 from Hobby Lobby. This finish is like using 50 coats of varnish (description from the manufacturer). 
But why did I get so excited about this finish? See the pictures below. Here is an example of a calendar system that the teacher made with the finish over the item. Take a close look at the pretzel!  The pretzel is 5 years old (if I remember correctly from my discussion with Tammy). Look at how well it preserves the textures, color, etc. of the item. Plus they are water proof!! Our students can drool on them and can hold up against accidental drops in water or paint. 


Above: rug time symbol. 
Below: the actual rug. 
The team in this classroom used felt and made a replica of the actual rug. Look at how well they match up!

I loved this stuff! I definitely recommend you add it to your resource tool box. I am sure you can use this finish for other items but I thought it was a gem for creating calendar box symbols. Thanks to Tammy and her crew for letting me snap some shots and share this awesome find!!

Saturday, September 21, 2013

Object Calendar Binder

Hi friends,
I'm excited to share this find: it's a object calendar binder (although the possibilities are endless). It was made by East Hartford Women's Club. Before I describe this great project, let's check out the pictures:


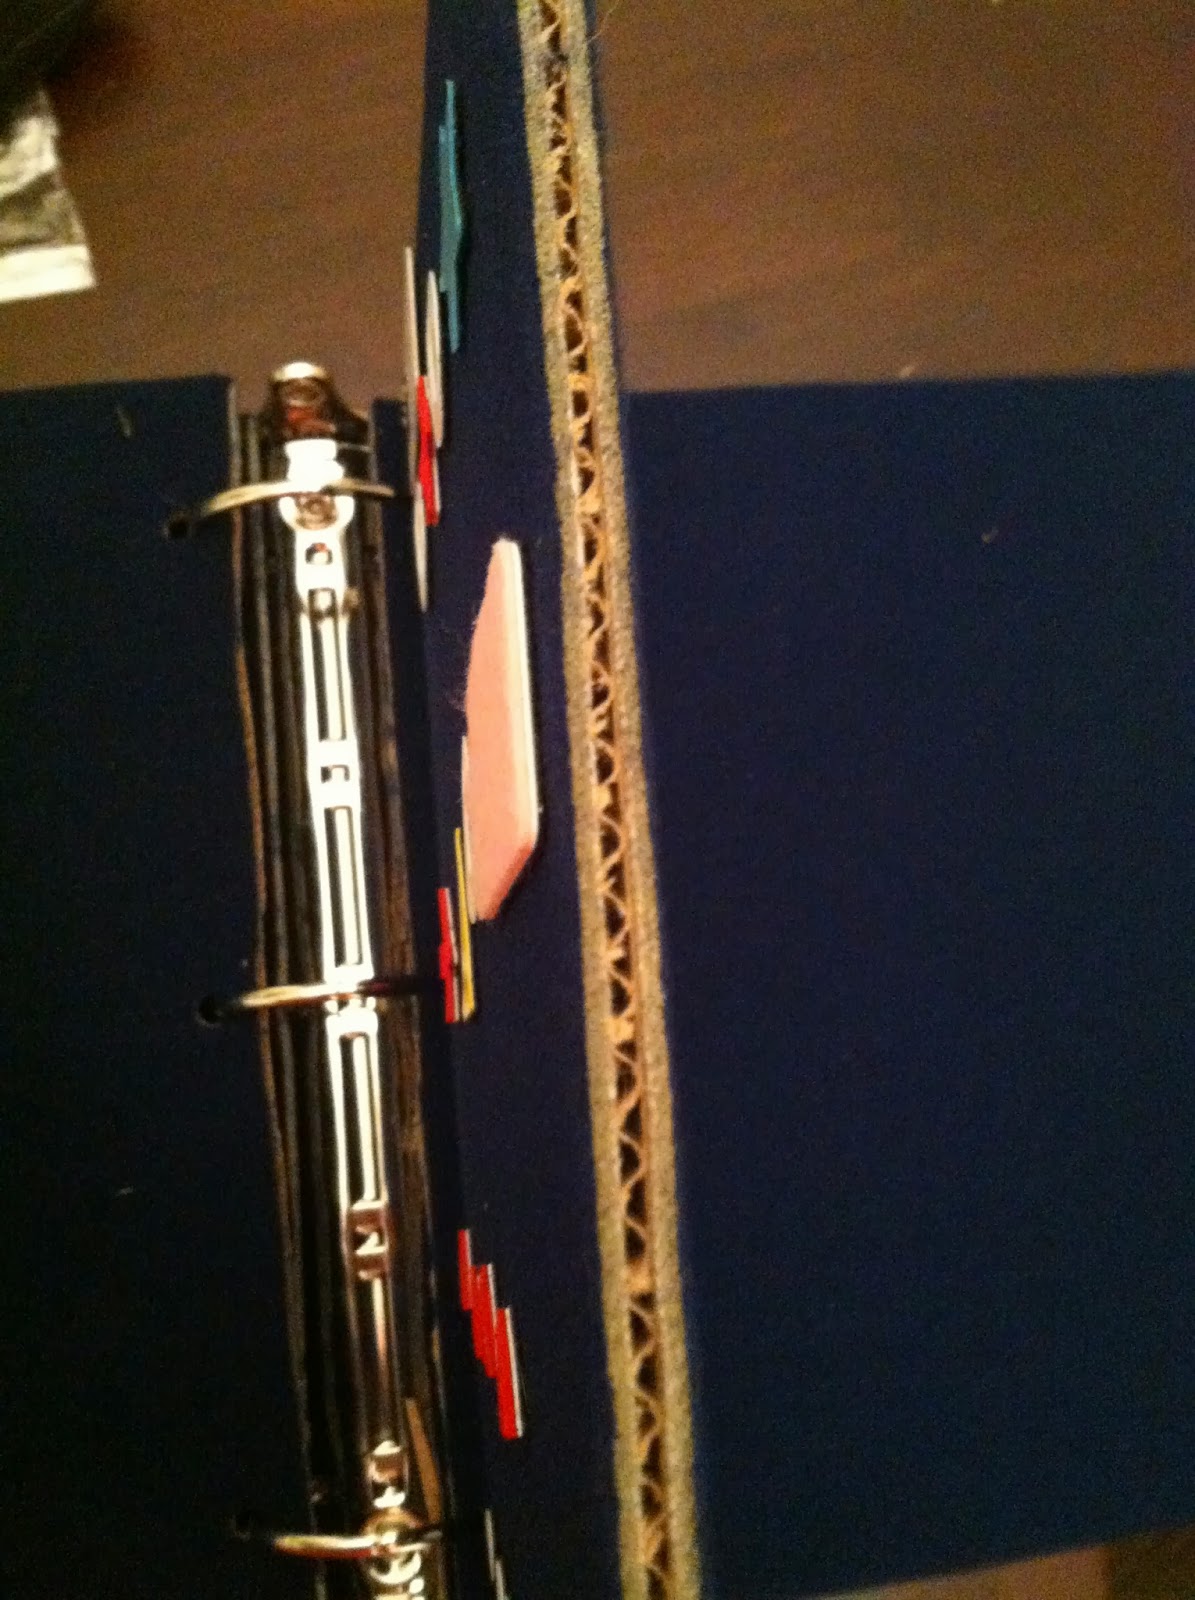
This binder has 6 pages. The pages are cardboard covered in nyloop. Nyloop can be tricky to find at first but once you find a local source, you are set! Nyloop is great because you can use a little velcro and objects stick right to it. The pictures show some ideas of what you can do. You can use it for matching activities, matching or sequencing. I like the idea of using it as a calendar box system. I recommend the binder idea for kids with multiple impairments. These binders are great because they are pretty durable, too.

Saturday, March 16, 2013

So many calendar boxes choices and only a DOLLAR!

I was strolling through one of my favorite stores today, Dollar Tree, and looked at their entire back wall with a big smile: it's a wall of calendar boxes and they are only a DOLLAR each!! 
Side note: do you shop at the one and only Dollar Tree? So many wonderful things for us and it's always just a dollar (shiny red wrapping paper, Easter eggs for cause and effect play, calendar boxes, black sharpies, curly red shiny ribbons...so many projects that this side note could easily turn into another new post!)

There are six rows in this picture. I'm gonna give you some ideas, row by row, starting from the top.
Row 1: The red baskets on top of the yellow--excellent for calendar boxes that go side by side and fit on a shelf (plus they are in the perfect colors!). The upside down orange, blue and green ones are great for finished boxes. 
Row 2: The narrow baskets (probably commonly used for utensils) are also nice side by side calendar boxes (these were the ones I had in my classroom). The blue, green and red ones are also nice ones too!
Row 3: The blue and green ones are great for organization. The last one on the far right (blue ones) are all stars.
Row 4: My favorite row!! There are so many great ones on this shelf!! The pink ones are perfect because you can tie a finished basket to a wheel chair (saw that great idea at a school). This way the tied on finished basket stays with the chair. If the student has a severe impairment, just pulling (or touching) the rope to the finished basket could keep the constant contact. I hope my description makes sense! Lastly, the yellow boxes--so bright and wonderful and perfect!! CVI!
Row 5: The larger green and red ones are nice finished boxes that sit nicely on a work table. They might be too big for a tray on a wheelchair. 
Row 6: Lots of baskets, handled baskets and buckets! These are nice for toys at home. 

I know, my faithful readers, that you are not just thinking that calendar box systems only happen at school. Look at all the possibilities!! Make sure you have a calendar box system at HOME! You can make SO many things happen at home and school. Don't stress out if you are thinking "I can't do a whole calendar box system at home!!". How about just starting with a simple finished box? Calendar box systems teach anticipation, time concepts, language, literacy---I could go on and on! If you can get a finished box going successfully but still can't get to a whole system, go to Now and Finished or Now, Next and Finished. Read up on all the posts with lots of great information for more information. 

Do it at home: Start using a finished box in your easiest, lowest stress routine at home. 

Sunday, August 5, 2012

More super finds at Target!

I was doing my usual walk through at Target and stumbled over to the back to school dollar bins and found another "super find"! I know we are in the middle of summer on vacation but have no fear, I am out finding good finds for the upcoming school year for you.
I saw these great little finds and thought they were perfect for calendar box systems. [Not know what calendar box systems are? I've blogged about it before so stop reading this little post and hop over and read about calendar box systems.] I also thought these finds were great for organization for preschoolers and great for sorting and sequencing for our MIVI/ASDVI students. 

Best part? The price ranges from $1-$2.50 in the dollar
 bin section at Target. 

These trays are great because they have a good size but they aren't too deep. They can also double as little work stations for our preschool crew.

Okay, this was a tougher pic to take because a lot of other things got in the way. I wanted to get a shot of all the different types of buckets. Sorry for visual clutter!

Perfect buckets for "finished" or "all done" boxes! The handle is also a little super find because it works as an attachment aid. I saw a teacher loop a nice fabric through the handle and attach it to their students' chair. I also liked that they had these in black. These are also great sorting buckets or "now" & "next" buckets. So many possibilities....

Wednesday, May 9, 2012

Awesome Resource!

Hi blog friends!
Whew!! Time has just been flying by for me so my apologies for not posting my usual Tuesday night post. I was so excited to be at Perkins School for the Blind's Early Connections conference. Two of my super fave students came up and helped me present as well as spoke on a panel discussion. I couldn't have been more proud! I have also recorded another webinar for AER with Justin A. Haegele (super fave APE teacher) so feel free to collect some CEUs or just some good ideas and check it out.


Anyways, back to business! I have an awesome resource that I want all of you to bookmark on your favorites that was sitting underneath my nose and I didn't even know until this past Perkins conference! Two of my super fab colleagues, Gail Feld and Gigi Whitford (CVI gurus and great TVIs) have put together a website called the Tip Sheet of the Month (and more!). Now I have seen some of these tip sheet handouts when we have collaborated on projects before but I had no idea that they had a whole website with resource treasures!


An example of one of their awesome handouts:

And another example of their handouts:

Go and download them with their expert advice and tips for the home and classroom on their site. Then make sure you add it to your favorites and check back each month. This is a great resource for general education teachers, special ed teachers, families, paras----I could really keep going! The other special spark about Gigi and Gail is that they are CVI gurus so there are lots of special notes and advice about that and you can email them about their handouts. Love this resource!!

Friday, November 4, 2011

Calendar Object System Board

Holy hannah blog family, I have a super awesome find from this week and I couldn't wait to share it!! This fantastic find was from the handy work of Matthew Tietjen with collaboration from Patty Leonard, TVI. Matthew is a TVI student doing his student teaching with us this semester.
I was doing my ususal rounds at the agency getting work to the TVIs and what not when I stumbled upon Matthew working in an empty cubicle.  He had made three fabulous calendar box/object symbol system for children who have multiple impairments that were visual learners (meaning they did not read Braille). These puppies are awesome and they are easy to make! I instantly knew that I had to blog about this so I immediately asked him if I could photograph and blog this. Then I had a few ideas of other ways you could use these boards. I am going to include all of the information on how to use, how to make and how this is awesome in this post. Get ready to read and then head out to round up supplies! I've made the pictures extra large size so you can really see all the details. 

Here's how to get started:
First, you must read my postings on calendar box systems. I've linked some fabulous articles and information about why and how they work. I love calendar box systems. I have used them over and over and I promise you, they are proven effective strategy.


Materials you need:
Thick, foam poster board. Matt used black and whiteCutting blade/box cutter, a good work space. I usually use a broken down cardboard box to cut things on so I don't cut my desk (I've done that before, ha ha...)Board maker softwareLaminatorBlack felt fabric (although any medium thick type fabric would do)Hot glue gun and a lot of glue sticksVelcro or hook & loopObject symbolsTwo hinges (can be purchased from Lowe's for about $3)Black permanent markerSmall plastic flexible bin/basketRed shiny fabricScissors


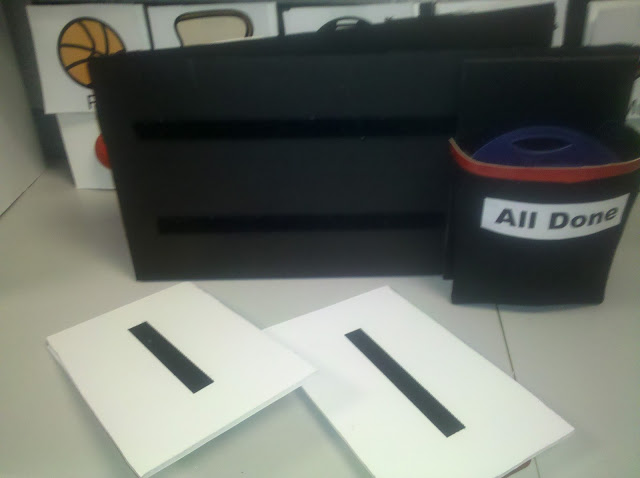
Matthew glued two hinges securely on the back of the board. The hinges allowed the material to be cut in half so the student is overwhelmed with information. 
 The thing that I loved about the hinges is that when it cut the material in half, it also gave it a new use. When folded, it provided two options: two objects followed immediately by the finished box and then three objects on the other side. This is awesome because you may have a student that is not ready for a full calendar box system. But they may be ready for now, next and finished system (remember the boards I made? Read about it in another post...) You could just use this side at the most basic level: now, next and finished with the student. Then, after they have got the hang of that, flip it over so you can use the three object side. You can do a three step sequence!! My favorite!! Three step sequences are awesome because you can do a "first, next, last" teaching sequence or a "beginning, middle, end". When the student has mastered this level, they are ready for the full board and the full line of objects. The other thing is that you can multi-use this board. You can still keep the full board for the object calendar box system but then fold it to the three object side when doing work and just put new Boardmaker pictures for the student to follow. 
 Each picture and symbol have velcro on it. This gives the option of the student using the picture or the symbol or both. I advised Matthew to put the velcro at the top of the picture (cut the velcro into a long rectangle) because when put at the top, it helps with the picture not flopping over at the corners and that helps eliminate glare (since they are laminated).
 I also advised Matthew to take a black marker and outline the velcro spot on the board. This makes it an easier target for placing the object in the right place. You may need to make a thicker black outline. It depends on the student. You could also use red. Then, I gave him some of my red shiny fabric to outline the all done (or can be labeled 'finished') at the top because without it, it was a lot of black and hard to tell with depth perception where to put the object in. Lastly (he was great to let me sit there and pop off all these ideas), I suggested he label the all done box so that they student sees the target. It's not exactly necessary but it can help. It also helps the teachers and support staff remember to label this when instructing. 

I took the individual object boards down so you can see how he put the velcro on it. Now, always remember this, use a lot of velcro! This gives a better target for students and it helps with durability. 
 
 Now, a word about the symbol choices here. You have to be careful with selecting object symbols as you want them to be meaningful not just a bunch of random plastic items. Matthew used symbols that I call 'purposeful plastic'. They are all plastic symbols but they are unique because of their meaning. For example, the soccer ball actually feels like a soccer ball as does the basket ball. They are both pretty darn good replicas of the real thing. Good choice. If he were to use some random plastic ball, there probably wouldn't be a lot of discrimination between the two and it would have been junk.  About the bread object for lunch. This too is plastic BUT I agree with this because it looks identical to the Boardmaker picture, it is thick, has texture and is a pretty good replica instead of using a piece of bread. You could use a fork and a for picture. That is a common object symbol for mealtimes. 
 My favorite of the object symbols is that for computer he used a Big Mac switch. When these students go to computer, this is what they use. A perfect choice for this picture. 


This is something you can do at home, school and for vocational training. I really loved these. They are easy to make, duplicate and aren't too expensive. I have a feeling I will be making these over and over for students to use. 

*Make sure you and your team (that includes parents) read up on calendar box systems. I can't stress it enough, they work!

Sunday, October 17, 2010

Now, Next & Finished Boards

Did you read my post on calendar systems? If you didn't get a chance, that's okay---I have included the link in this post. For this post, I included pictures of a 'now, next & finished board' communication system. I created this set for a child who is on the autism spectrum & is congenitally blind (ASDVI).

This is the first thing I want you to think about: how does my child understand time concepts? Do they understand the concept of 'now'? Time concepts can be difficult to teach and learn. Many educators use a 'finished/all done box system. (I will post more about finished boxes in another post). Finished boxes are great except they only have one problem: they only teach the concept of 'finished'. You also need to teach about now and next to make it a sequence.

Here's what I want you to read: "Let Me Check My Calendar" by Robbie Blaha
www.tsbvi.edu/.../Let%20Me%20Check%20My%20Calendar.htm

Sometimes using a complete calendar system is too much for a child. That is where now & next systems come in to play. They teach the foundation to learning how to use a full calendar system. Here is an example of how to make a now & next system.
The Now & Next boards:


I put a different texture over the finished board to help my student distinguish it
from the now & next boards.
There is a Braille label over the words 'now' & 'finished'.
(Font issues are not a factor for this student because she is not a print reader. I just wanted it to look cute. If font size and type was an issue, I would have chosen an easy to read font like Arial)


I used Velcro (or hook & loop) for attaching items.
I used a wide strip on the actual board to make it easier to mount item.

Objects for Now & Next boards:

Materials:
-Foam board (can be purchased from an art supply store or JoAnn Fabrics)
-hot glue gun
-Fabric (for finished board)
-Velcro (or hook & loop)
-paper & Braille labels
(I also used a sturdy board to mount some of the objects to)
-Objects
(keep in mind: symbols should be an actual representation or part of something from the actual activity. For example, the toothbrush represents toothbrushing. I found an item that looks like a tray to represent table work since the student uses a tray when working at the table.)
-I always get two or more of each symbol in as a backup.

A few tips about using now & next boards or calendar box systems:
-They are meant to be used to before and after an activity to reinforce time concepts or to pre-teach an activity.
-It is important to use consistent language and to use them consistently throughout the day.
-Give wait time for children to process. Encourge them to initiate activity. Follow their lead.
-Calendar box systems/now & next boards should be used naturally as part of activities. Write yourself cheat sheet notes to help you with language and what to do.
-Consult with your TVI for tips and strategies.
-Encourage your classroom teachers to use calendar box systems/now & next boards throughout the day at school.