Showing posts with label Cortical Visual Impairment (CVI). Show all posts

Saturday, November 25, 2017

CVI Supplies at Dollar Tree Holiday 2017


It is not a secret that now is the time to buy CVI supplies such as Christmas lights, garland, tinsel, ornaments, etc. I have blogged about it myself for years to buy up these hot items (and then go back again at Valentine's Day for more!!). I was at Dollar Tree again and saw the new displays of holiday decorations and thought I would share some sweet buys from this season. I also wanted to share some important tips for using these decorations without overwhelming your student. 
Let's get started:
  • Most important:  how to keep your decorations meaningful for vision. The old saying KISS comes into play here. Keep It Simple for Students. Know your student's what and where vision. This means what can they see (color, shape, 2D vs 3D, etc.) and where can they see it (peripheral, central, left or right/up and or down). 
  • Environment matters: This may be old hat to some of you but if you are new or unfamiliar to CVI, always remember that the environment matters. This means to have contrast (black background always works so that the decoration shows up nice without visual clutter). Other important factors are sound, lighting, etc. Some students simply cannot tolerate a cluttered background (includes sounds, smells and visual items). 
  • Work in items gradually and then just wait and I mean WAIT! Present the decorations and then just let your student see the item.
Every year Dollar Tree puts out awesome holiday items. 
Here's this year's top picks for CVI this year:
(below picture is a rack of garland, ornaments, ribbon and snowman in traditional holiday colors)
The ornaments are good (I prefer going for the shatterproof ones at Michael's or Joann on sale). You can hang them in a variety of ways to catch your student's attention. I really like the garland! It is shiny, has fun movement and has good color. Don't discount the snowman either! They have fun texture, contrast and you can add lights. 


Picture (image description: lots of different holiday ribbons and bows in traditional holiday colors).
These curler ribbons and bows are totally a hit! You can pull at them or lace some bells or other fun toys on them and they are tough to destroy. I like the standard bows and add magnets to them. You can use a cookie sheet (also can be purchased from Dollar Tree) to do fun activities (see my last year post on Christmas/holiday activities: http://adifferentkindofvision.blogspot.com/2016/12/easy-accessible-christmas-activities.html). 

Picture (image description: shiny silver buckets, plates, for food display). 
I included this one because these platters, buckets, etc. are so fun to reflect light or even act as a mirror. Most people usually stick with the traditional holiday color/decorations but miss the silver mirror type objects. They are awesome accessory pieces!


I wanted to include the garland again because it is such a fun hit. All four of these colors: silver, red, gold and green, work together so nicely. The gold and silver provide a nice contrast to the red and green. Red is a fave CVI color but I also want to encourage you to try green. Green has been an increasingly great color with so many of my CVI students. This garland is pretty thick though so if you are thinking of using it to hang other items, keep an eye out. Your object must be larger than the garland. 

A few other items that I like are:
  • the cookie tins (wrap them in shiny wrapping paper and put things inside to shake for sound). 
  • wrapping paper (pick the shiny kind!)
  • holiday leaves and decorations like poinsettia (they are just fun textures--watch for choking). 
I also recommend hitting up the coupons from Joann and Michael's. Joann coupon deals for fabric are top notch. I like to buy velvet or fur (you can get it in black!). I use it as a big mat/blanket for students to lay on or as a background. I have bought a TON of of ribbon in a variety of textures and colors from Michael's. There are so many activities to make with ribbon (both super fat width, normal and a little wide). 

Have some fun holiday fun!! 
Check out my post from last year that has a ton of fun holiday activities: http://adifferentkindofvision.blogspot.com/2016/12/easy-accessible-christmas-activities.html


Friday, June 24, 2016

Flashlight fun


Lights for your CVI Instructional Toolbox

Happy summer friends!
I found these fun flashlights at Walmart the other day and instantly knew that it would be the perfect addition to my sensory room. These flashlights come in a variety of different colors, red, blue and green and come in a variety of sizes (thin and fat ones). I like them because of their color illumination (they are so bright) and the variety of light options. They illuminate to a solid color (see pictures), blink and have true white light (so many fun options!!).  I bought the thin ones for about $3 a piece and the other ones for about $7. I loved how bright then thin glow sticks illuminated!

Flashlight for CVI kids
Place the flashlights on a black contrast board from APH to provide visual efficiency
 I also liked these lights because they are super portable! You can throw them into a bag and take them anywhere. I like to use them with the felt board from APH (available on quota funds). If you are using them in the classroom, you can also hang them or place them on the floor/desk. I bought some to use for my sensory rooms and my own CVI kit.

And just when you thought these lights were only for our CVI kids, let me tell you the initial reason that I purchased them: I bought them for nighttime for my current STEM Camp. I divided each group into a color. I gave the group leaders and students one color. Many of the students have good color vision and since the colors red, green and blue are distinctive, it was easy for students to see. We used them at night to walk back to the dorms. Students were able to follow the lights. Much easier than a whole bunch of white light flashlights that were shining everywhere. Note: these lights were used for identification, not for lighting the path. Group leaders had one main light to help with traveling safely. 

Add 

Friday, March 18, 2016

Sensory Easter Eggs

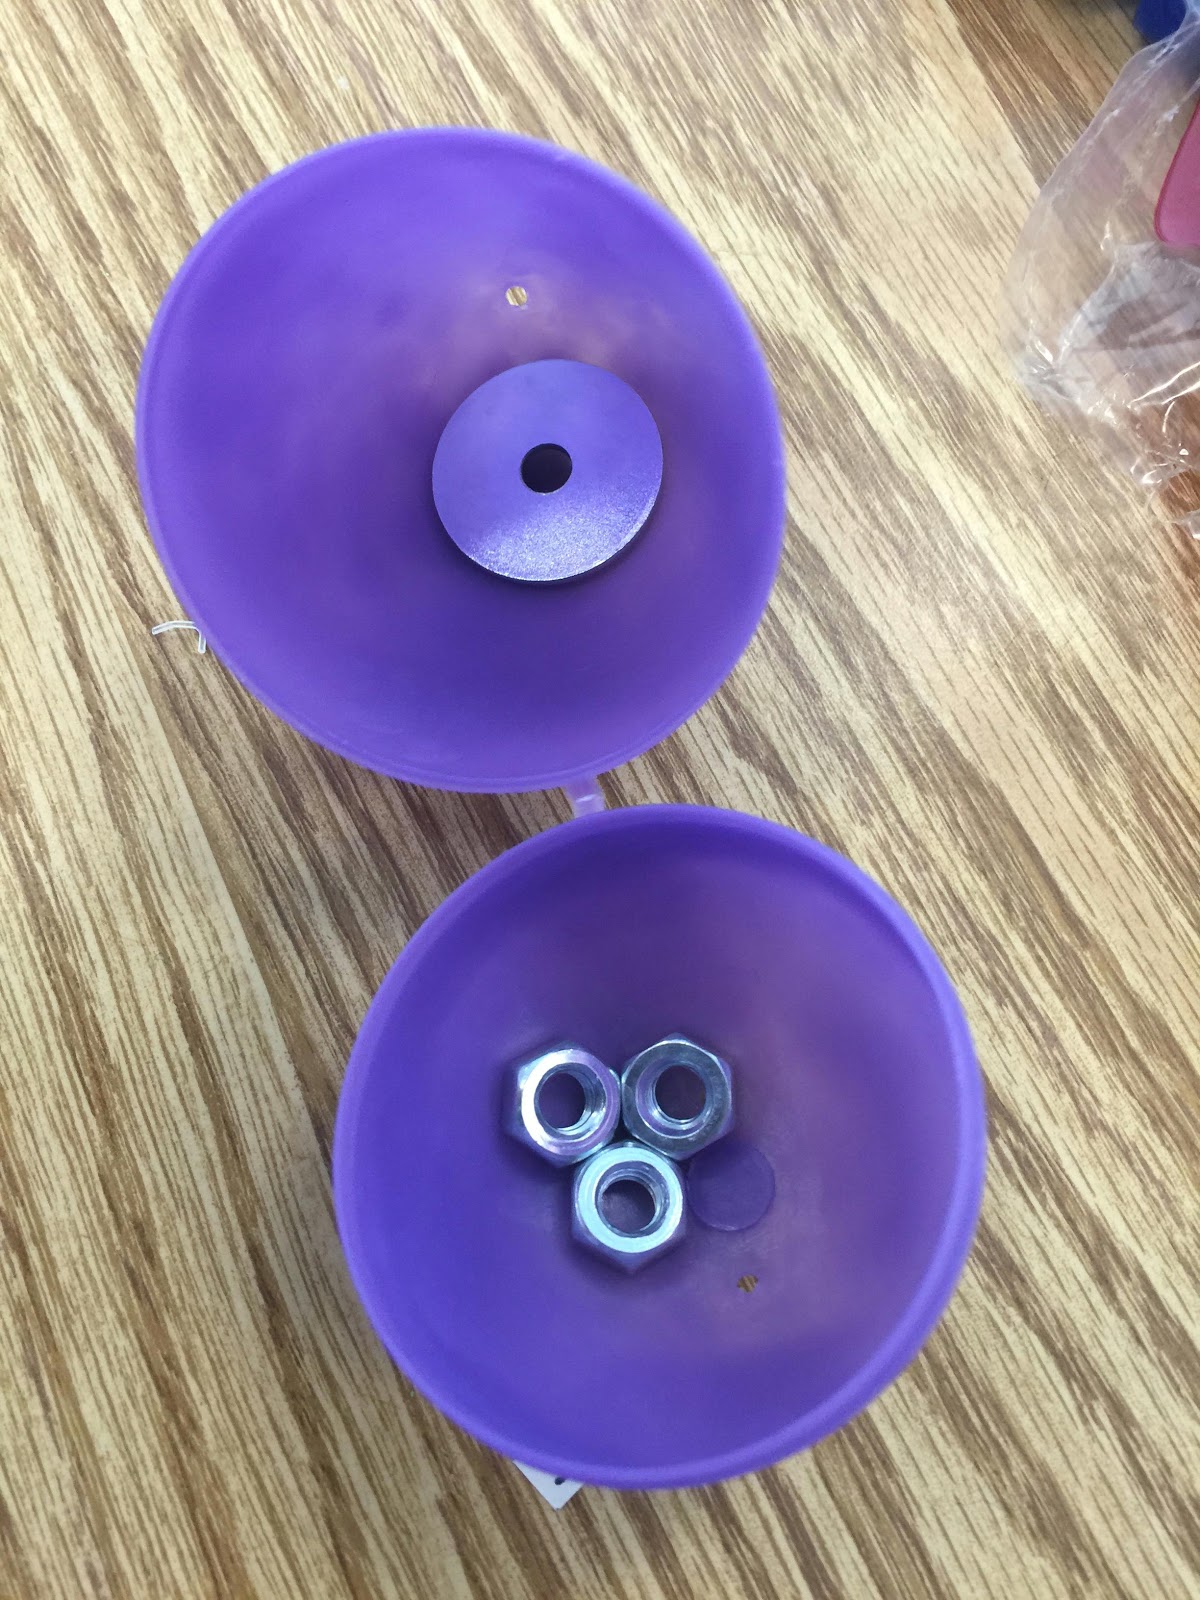
Have some sensory fun with Easter eggs this year! I ordered beeping Easter eggs and had a fun hunt with my students but I got to thinking about some of my other students that thrive with more sensory input. I bought textures, items for weightand some cellophane to make these fun eggs. My students loved them!  I made sure to leave little tabs on certain eggs like the ones with cellophane so that my students could flick the ends as well. There are so many options!  I also made a few matching eggs so that we could later do a match game. It was also fun to think outside of the box and use other items such as rubber bands to create interesting texture. It was a hit! You can easily use good old standbys like rice and beans to fill eggs. I also used nuts and washers from the tool section for weight. Bells are always fun, too! All of my students really liked making them and it nicely includes my more severe students. Happy Easter!!
Sensory Easter Eggs
different textures that allow blind kids to have a variety of sensory Easter eggs
Sensory Easter eggs
lots of sensory ideas inside the Easter eggs
Easter eggs for kids with Cortical Vision Impairment

Tuesday, February 23, 2016

Communication Symbol System

I was hanging out one day in our school and I found some really old stuff like floppy disk and these diskette binder sheets. I looked at these sheets and inspiration struck!! I didn't have any disks hanging around but I did have some binders. 

I serve on our school augmentative assistive tech team. I love it because I learn so much collaborating with some brilliant minds. A colleague on my augmentative team taught me about using partner assisted scanning-PODD (check out the video about this later in this post). 

I have students that have severe multiple impairments that I want to engage using calendar box systems. They all have wonderful interveners. These students are at the basic level of using symbols. Most of my students in this situation have CVI. I think using the partner assisted scanning system is a great fit for several of them. I came up with this binder symbol idea to help prepare them to use the partner assisted scanning technique and to incorporate  more language (using symbols) into daily routines. Enter the diskette binder sheets!!
**The pictures are from a prototype trial. You could easily use a different color binder. White may not be the right color binder background**

Communication system for blind kids
Here's the "how to":
1. Make symbols using pictures, real symbols or a combination of both. The real object symbols are helpful for basic level students because it allows the tactual feel to the picture. Consult your CVI matrix to help with progressing student to picture only. 
2. I like arranging the pictures landscape. The pictures in this post are portrait because it was a better fit for the particular student. 
3. Place velcro on the front of each pocket (this allows you place the symbol on the outside/front of the pocket). I would discourage your from keeping the pictures inside the pockets because it washes out the symbol. (See both above and below pictures).
4. The goal is to use the binder symbol system to train the student to look at choices and then to make them. They are placed at opposite corners on purpose. The opposite corners are to help with identifying a clear choice for students (if placed too close together, it could potentially be too difficult for the adult to interpret the choice). 
5. Use blank disk sheets for instruction. As you can see from the pictures, it is visually confusing to place choices (in front) with the other symbols in the pockets (see example picture below). I included this picture to point out this confusion. 

Binder communication system for blind kids

Here are some examples of the real object symbols. The top picture is the student's Eagle Eyes symbols. We were lucky to get the actual wiring that is used. The bottom picture is for the weekly music therapy. The black background is an excellent visual choice for the symbols.

communication cards for blind kids

Check out the partner assisted scanning technique. I have watched several YouTube videos on this and this is a great one for our students. If you watch other videos, you can see that this strategy can bring a lot of language to use. The students learn the system and can anticipate where the pictures are. The binder symbol system is a very basic way to pre-teach the skills needed to advance to the partner assisted scanning technique. Students may just keep working at the binder symbol system level as well. 


Monday, January 18, 2016

Color Up Your Windows

We have a long hallway that are all glass in our school. I wanted to find a way to provide some "life" to our walk that would be effective for our students. I loved the idea of stain glass but with the intricate design of it, it just ends up as visual complexity for most of my students. I kept looking for the beauty of wallpaper but not the complexity. 
Then I found Wallpaper for Windows and it was an answer to my prayers! 
The "wallpaper" has nice bold colors that are quite visible for my low vision students. The wallpaper is designed to work with the sun so it doesn't wash out color. In fact, it enhances it!

It comes in both a see through and matte finish. It is so easy to put up!! All you need is spray bottle, soap and water. 
Our boring glass hallway now has some fun life to it. I purposefully did not duplicate anything so that my students could use items for landmarks (O&M). Teachers can easily tell students to meet them at the red circles or blue squares, etc. 


I also loved the wallpaper because it gave my students with multiple impairments something to look at as they are wheeled through the hallway. These students can stop at different windows and have something fun to look at. 

You can also teach concepts like in/out, big/small, up/down, etc. with the different pre-cut patterns. 

I luckily have a whole glass hallway to color up but I thought it was worth sharing for any classrooms, bedrooms, etc. for students. It's definitely given my students something fun to look for, use as an attention getter for their vision and fun to gaze at. 
Here's the link to Wallpaper for Windows: http://www.wallpaperforwindows.com/pc/home.asp
**The pictures don't do it justice. The colors are so bold and fun! It's not that expensive to buy so take a chance and order some :)


Thursday, November 12, 2015

New Must Have Trays!


Dollar Tree logo

Hello friends! 
I was out on my usual rounds at Dollar Tree buying some calendar object and finished baskets when creativity hit me. I have already blogged about how to use a variety of baskets for sorting, sequencing, calendar box systems and finished boxes. Check out my older posts if you want a review of using these boxes.

Dollar Store trays for teaching blind kids
This Dollar Store tray is perfect for teaching sorting skills for blind kids 

I found five other trays that you have to go buy RIGHT NOW! Once Dollar Tree sells out, they can be gone forever especially with the holidays right around the corner. Stock up!

Above (black tray): Of course this is a great sorting tray! You could also do a little sequencing with it, too. The sequence can be following a clock face or just up/down or left/right. Lots of possibilities!

Below (red tray): I saw this one and was intrigued with what we could actually do with it. I thought you might able to use sequencing or sorting with cups. The three rows are really cool because you can use a top, middle and bottom sequence. You can flip it over, add velcro to the circles (in the middle of circle) and you can sequence that way, too.  These are just starter ideas. The sky is the limit!

Dollar Store trays for teaching blind kids
This Dollar Store tray teaching sequencing skills for kids who are blind
Below (red square tray): I loved this tray because I thought this would be nice to use with velcro. You could do some matching with it. The velcro would serve as a place holder.  I also liked the unique "walls" on this tray. The sides are unique to use. Lastly, I liked this tray because it is a square and not a rectangle. They are smaller in size than most trays as well. 


Above (silver tray top): The first thing to remember about this and all Dollar Store trays is that they aren't always make of thick durable material. That doesn't mean you shouldn't buy them. It just means that you should plenty for replacement and/or have reinforcements.  This silver tray is a tray top that I found in the baking tin section. I loved this tray top because of its color and the texture! How fun is this tray!? This is the kind of tray that you could just use alone--no texture, no sequence or anything. Just fun to use!

Below (red tray): This was also found in the backing section. The red is actually just an insert. It is very thin plastic but has potential nonetheless. This tray is a nice size. I like it for putting 1-2 simple items in for discovery or using it for sensory items. But then again, these are all just starter ideas! Have fun and be inventive!!

ps--I found these trays on Tuesday, November 10th. Hit up several Dollar Trees to complete your collection (that's what I like to do!)


Friday, September 25, 2015

Painting with a Light Box

Doesn't this look fun? This fun idea is shared thanks to our Parent Infant Program at USDB. This painting fun activity uses a simple light box, yellow duct tape, plastic bags and paint. 

This easy peasy activity is so attractive for our little ones and our kiddos with multiple impairments. The yellow tape has a double duty mission responsibilities. First, it holds the plastic bags in place. Second, it has a nice highlight that attracts our kids' attention. You could also use floor tape because it is easier to remove than duct tape. 


The color choices of the dark blue and orange work well because of the way the light  illuminates them. You could also try purple or red and maybe even add some glitter (or something that shines) and see what that does. 


Here is my baby Abigail painting with my older daughter Morgan. Think of all the other ways you can play with this!? 

Tuesday, May 5, 2015

On the go!

We recently had our early intervention family camp and oh man, did I see some good ideas and meet some great families!! I have so many fun things to blog about that I had a hard time choosing what to start first with. I met this great mom, Angela, the first night of camp. I was instantly drawn to her cute little girl, Abigail, in this wagon. I instantly noticed it because lots of parents were there and pushing their kids in strollers. Angela had her son (about 1 1/2 years old I am guessing) in tow. I inquired why she chose a wagon. Abi was sitting in her tumble form chair relaxed and taking all the activities in. Angela showed me how easy it was to put her son right in the wagon and tow the both of them. We chatted and I went on with my work at camp. 

I saw them later that night and just couldn't stop thinking about what a neat idea this wagon was. I got to thinking about how many other families use a wagon for parades, vacations, etc. to tow their little ones. I also thought about how cumbersome a stroller can be (as I am still using one for my sweet little girl). Angela told me that she purchased her wagon from Costco for about $50. She also has another one that is a Radio Flyer. I know that sometimes when you have a child with impairments it feels like you are always standing out. It can be hard to lug around equipment, rangle other children and take care of everyone's needs. I liked this because this wagon is something that lots of parents use for things. I felt like it kinda took away some "stigma". I also thought about visual needs and how sometimes when I am pushing my daughter in our stroller the sun hits her and I can't move the shade down far enough. I love that Angela could just reverse the seating position of the tumble form so that Abigail isn't facing the sun.  

Just as I was pretty sure that this was the coolest thing I'd seen at camp, Angela showed me how easy peasy this wagon is to fold up. She did this all by herself in about 2 minutes max! She unbuckled her girl, lifted her up with one hand, picked up the tumble form chair and then grabs this handle and the whole wagon folds up into a compact square. She did it all with just one hand!

I found out that Angela writes a blog about her beautiful little girl. Here's the link: http://abigailsepilepsy.blogspot.com/. It's worth your time to check it out. Thanks again to Angela and Abigail for sharing your great idea with us!

Saturday, January 31, 2015

Stock up time!

Hi friends,
It's that time of the year again....stock up time!!! I was doing my usual rounds at Dollar Tree and noticed that Valentine's Day decorations are up and ready. We know what that means! I took some pics of my latest finds at Dollar Tree and am sharing to help inspire your shopping.


Stock up on great items like this for classroom modifications. These are especially true for our younger kids with CVI. Stock up and have some fun shopping!!

Sunday, January 11, 2015

Easy Work Table Modification

Hi friends,
I am happy to share another fun project that I have been working on in our classrooms. This one is easy peasy and is quite effective especially for our kiddos with CVI. Do you know what floor tape is? I learned about it from my PE peeps as we were taping the floor for goalball. If you don't know what floor tape is, hop on Google. It's a nice vinyl removable tape that is easy to lay down and easy to take off. I ordered about a million rolls of floor tape in red, yellow and black colors. I ordered mine from S&S Worldwide for a pretty good price. It comes in different widths and colors (but I always pick the red, yellow and black rolls :). This work table modification idea came from looking at the basic work tables that were in our classrooms. They were nice tables but the problem was that the table top's white color was reflective with the overhead lights. It was kinda hard to look at and work with especially for our CVI kids. I was in a preschool classroom when I pondered this problem. Then the lightbulb went off: grab my yellow and red rolls of floor tape! In 10 minutes I was able to modify these table tops for our kiddos.
You can buy floor tape from distributors such as S&S Worldwide and Flaghouse among other popular school distribution companies. It comes in a variety of widths.

 Here are some pictures of the before and after to my easy peasy modifications. I decided to use one table as the "red" table and the other as the "yellow" table to make allow a choice of which table to sit at.
 I liked this idea because it provided a contrasting boundary as well as a visual efficiency modification for the kiddos in this classroom. I'd like to thank the teacher of this classroom, Catherine, for letting me tape things up. 
You could choose to make the border a thick or thin. I just used one frame around the table top but you could easily double this up by placing an additional tape next to the first one for a thicker frame. 

Saturday, December 20, 2014

CVI Target

Happy December friends! I bet everyone is on the go with holiday activities. I hope everyone has been buying up items for your CVI kits. I have been! I have also been doing a lot of work in our classrooms for CVI modifications. Here's one little project that I just finished up. I got the original idea from Pinterest (of course!). This idea came to me because the student I was making modifications for is in a wheelchair and has a head rest to support his head. I wanted to find a way to provide a good target that his team could present items without having the visual clutter in the background.

Here's the original idea and the site that I got the directions from:
http://www.simplesimonandco.com/2011/06/target-building-instructions.html

Clearly the burlap color wasn't going to cut it but the idea was still gold! 
Here's how I modified it for this student:
My handsome husband and partner-in-crime did the building. It was all made out of PVC pipe. 
Easy to make! We didn't glue it so that I can take it apart and move it around. 


This is the back side of the target. I like the middle post because it allows me to hang stuff on it and use both sides of the target. 


Last I added the Christmas lights to attract his attention. He really responds to lights. Now his team can roll him up next to the target backdrop and work with him. Easy peasy and visually awesome to look at!