Tuesday, April 26, 2016

DIY Sensory Bridge


Hi friends! I am excited to share another DIY project: a sensory light bridge!
This is another easy peasy project that you can make in about an hour (thanks again to my awesome husband for making the frame). 
The original idea came because of the wedge mats (do you see them in the background--they are yellow and black). Many of the students in this class require a lot of physical support. The teacher and I were brainstorming about different ways we could provide instruction especially when the students are placed on the floor.

A light bulb went off for me and thought about having a PVC "bridge" that could hang items above students when they are on the floor. Check out how the idea turned out!

Sensory light bridge for blind kids
Different toys that create a sensory activity for kids with blindness. Use assistive technology to add light for kids with Cortical Vision Impairment
I hit up Lowe's and bought some PVC pipes. We bought the 2 inch pipes and caps. My hubby designed this to be broken down to two pieces (in the middle there is a T cap that connects them). The legs are a simple T stand. It took about 15 minutes to assemble (including cutting PVC pipe).

Now comes the fun part! Thanks to the teacher for taking this idea and making it awesome!! She added rope lights, garland, hanging toys that make sound, beads and paper lanterns. The lights and the CD player (it's on the ground) are hooked up to a switch (it's the big yellow button on the floor). 
Sensory light bridge for blind kids

 The above picture shows the rope lights turned on and the below picture is with lights turned off. Look at how fun it is when the lights turned on! I love the versatility of the sensory bridge. The teacher uses the sensory bridge when the students are lying on the mat (notice how long many items are so students can bat at them) but you can also take the Rifton chairs and line them up (as pictured). The students take turns using the switch.

blind kids with sensory activity
Blind students can sit in their Rifton chairs to access sensory activity in a preschool classroom
As always, I will point out that these activities help provide Expanded Core Curriculum instruction. Can you see how? You can easily list assistive tech, orientation and mobility and sensory efficiency skills when students engage with the sensory bridge. Other areas such as self-determination (making choices and choosing to engage) and recreation and leisure (playing with items for fun) are also areas.   Keep in mind to be on the lookout for visual or auditory clutter! Know your students and know what overwhelms them. Think about slowly integrating items. Watch for students to "see" items. All in all, this project will cost you about $7 and is a great item for early childhood. Have fun!


Friday, April 22, 2016

DIY Career Academy

Looking for an interactive way to teach career education? Organize a career academy! This was part of my short term program a few months ago (other part was going to a trampoline park--I called it "jump into the career academy"). The idea came to me as a way of teaching about career education to my intermediate through high school grades. This was a hands-on experience that taught about different types of careers. Here are some of the careers we had: massage, cake decorating/baking, catering, culinary, therapy dog trainer and mechanics. 
I invited several community partners to be with us. Paul Mitchell (the school) came and ran our beauty/handsome school and taught our students about hygiene, styling your hair and how to look your best. I love how their instructors taught our kids! They had them feel their own hair and how to identify their own hair texture. They brought props to help with teaching braiding and products to learn how to use them.  I also invited a chef (we met him when I took my students to do hibachi),  a catering manager and massage therapists. I love bringing in community partners because of the mutual learning opportunities it provides. Not only do we learn about them but they learn how to work with people with vision impairments. It's such a win, win!! 


There are a few tricks of the trade that I want to share when planning your own career academy. 
1. Group students--organize them based on skill and maturity. This way the lesson can go at a good pace for all students. It is difficult for the teachers to teach scattered levels of ability in a short amount of time. I did have students that required a slower or more modified pace. They were in the same group in break out sessions and it helped them not feel rushed. 
2. Use related service and community partners as instructors--In culinary school I had our professional chef lead but used my OT students to provide support. The combined knowledge was a great skill set for teaching students skills.
3. Look for careers and not just jobs---There is a difference between a job and a career. The focus was to discuss careers. We discussed the type of training, assistive technology needs and realistic opportunities for people with vision impairments. Did you know that massage is a great opportunity for our kids? We discussed how some things that are recreational could be developed into something more (like becoming a therapy dog trainer).
4. KISS--Keep it simple stupid! The lessons were all designed to fit into a 50 minute window. The cooking recipe needed to be something doable but that also really taught skills at the same time. We made chicken fried rice. We used electric skillets, cooked chicken and incorporated frozen veggies and a rice cooker. 
5. Think outside of the box--I invited some mechanics to come and teach our kids about auto mechanics because usually our kids get passed by about learning about this topic.  Students learned how to identify all four tires, remove a flat tire (and fix it) and learn about what happens under the hood. Naturally there are things that may be beyond what our kids can do (simply because of the vision required) but we should still "fill them in" so they can have the understanding.  I also invited a cake decorator to come and teach our kids how to cake decorate. We brainstormed awesome ways for our kids (including those with no vision) how to make beautiful cakes. 


Students learned how to remove and fix a flat tire.

Our cake decorator instructor had the brilliant idea to use cookie cutters to teach design. Students placed the cookie cutter on their cake and used it to follow the "pattern". 


We learned all about massage and the different types of massage that can be offered. 


The day went by fast and crazy but all students had a great time. We were able to have a follow up Q&A with all our instructors and students were able to take home projects and tip sheets. 
Can you identify all the nine areas of the ECC that we covered today? We hit on all of them in a meaningful way. 

My follow up activity will be taking the students off campus to the actual locations. We have been fortunate enough to have our community partners stay on as mentors. Our catering manager has volunteered to be our catering mentor for our campus transition students that are now running their own catering business. Our mentor gives our students feedback and training. This is valuable because it develops their skill set and even provides an opportunity for some to apply to work at a Paradise Bakery or Panera in their catering department. I'll write up our part two as soon as we have it!


Monday, April 11, 2016

National Call In Day to Support the Cogswell-Macy Act

Mark your calendar! Spread the word!
April 14, 2016!
National Cogswell-Macy Act Call-In Day:
Sound Off for Students with Sensory Disabilities!
Call: 1-844-232-8210
Learn How You Can Help: http://www.afb.org/callinday
image: megaphone
text: National Call-In Day
Cogswell-Macy Act
April 14, 2016
www.afb.org/CallInDay
Save the date!
Be a voice for change
for kids with sensory disabilities

Tuesday, April 5, 2016

Literacy Fun with Chicka Chicka Boom Boom!

We have a long walk from our classrooms to certain areas such as the cafeteria or library on our campus. One of our preschool teachers had a difficult time herding her class back and forth. I saw an idea she tried where she put items for the students to touch on their walk. This gave some anticipation, hurried those little feet along and provided some exploration experiences. I thought it was a great idea and decided to add some literacy fun. I selected the book Chicka Chicka Boom Boom because it is one of the best children's books! It has great rhythm. It was one of my favorites when I was a classroom teacher.

It didn't take me long to create a walkway with the story. The book walk begins with the coconut tree. I had a cardboard box that was the perfect length and width for the base of my tree. I also had this awesome leather fabric that I hot glued around the box. The palms were made out of cardboard (I peeled the layers of cardboard apart. I didn't have anything that was similar to palm leaf that would be as sturdy as cardboard) and spray painted it green. I used plastic balls (like from sensory play ball bins) and used them as my "coconuts".
literacy for blind kids

I didn't want to get carried away with the design. I wanted to keep it simple and accessible for students. Keep that in mind: your textures, items, etc. shouldn't become a distraction. My focus was the story. I also wanted to include some pre-Braille and something for our kiddos with multiple impairments.
I typed everything in Arial bold large print. The letters are highlighted in different colors. I also made Braille letters (so if you see the letter B, you can also feel the Braille letter B on top). I used the standard Braille label paper. I also put Braille on the words "coconut tree". I used tactual symbols for the parts of the story that mention coconut tree. I did that because the goal is that the student starts with touching the coconut tree. I then took the same tactual pieces (leather and ball aka tree and coconut) and placed them on the signs. The leather and ball were consistently placed on every sign. This was specifically for our children who have multiple impairments.

 Braille literacy project

Braille literacy project

Braille literacy project

There is also Braille on the "chicka chicka boom boom".

Something to consider: glare factor. Can you see some glare on the signs? I used our roll laminator but the down side is the glare factor. What to do? I redid some of the signs that got hit hard with light with non-glare laminate. I bought mine from School Specialty but you can look it up anywhere. You can also look for matte laminate to help with this. I also considered the placement of the signs.

Lucky for me that I was given a large print copy of the book. I used it at the beginning of the walk.
This hallway doesn't really have much going on so there aren't too many areas to explore. Literacy is all around us and for kiddos with vision impairments, we have to create opportunities to access it. Can you see how this book walk is an expanded core lesson as well? Hints: think of it's location (orientation and mobility), reading the Braille or symbols (compensatory), recreation of the reading the story (recreation and leisure), discussion of who writes a story (career education)....and the list goes on and on! 


Friday, March 18, 2016

Sensory Easter Eggs

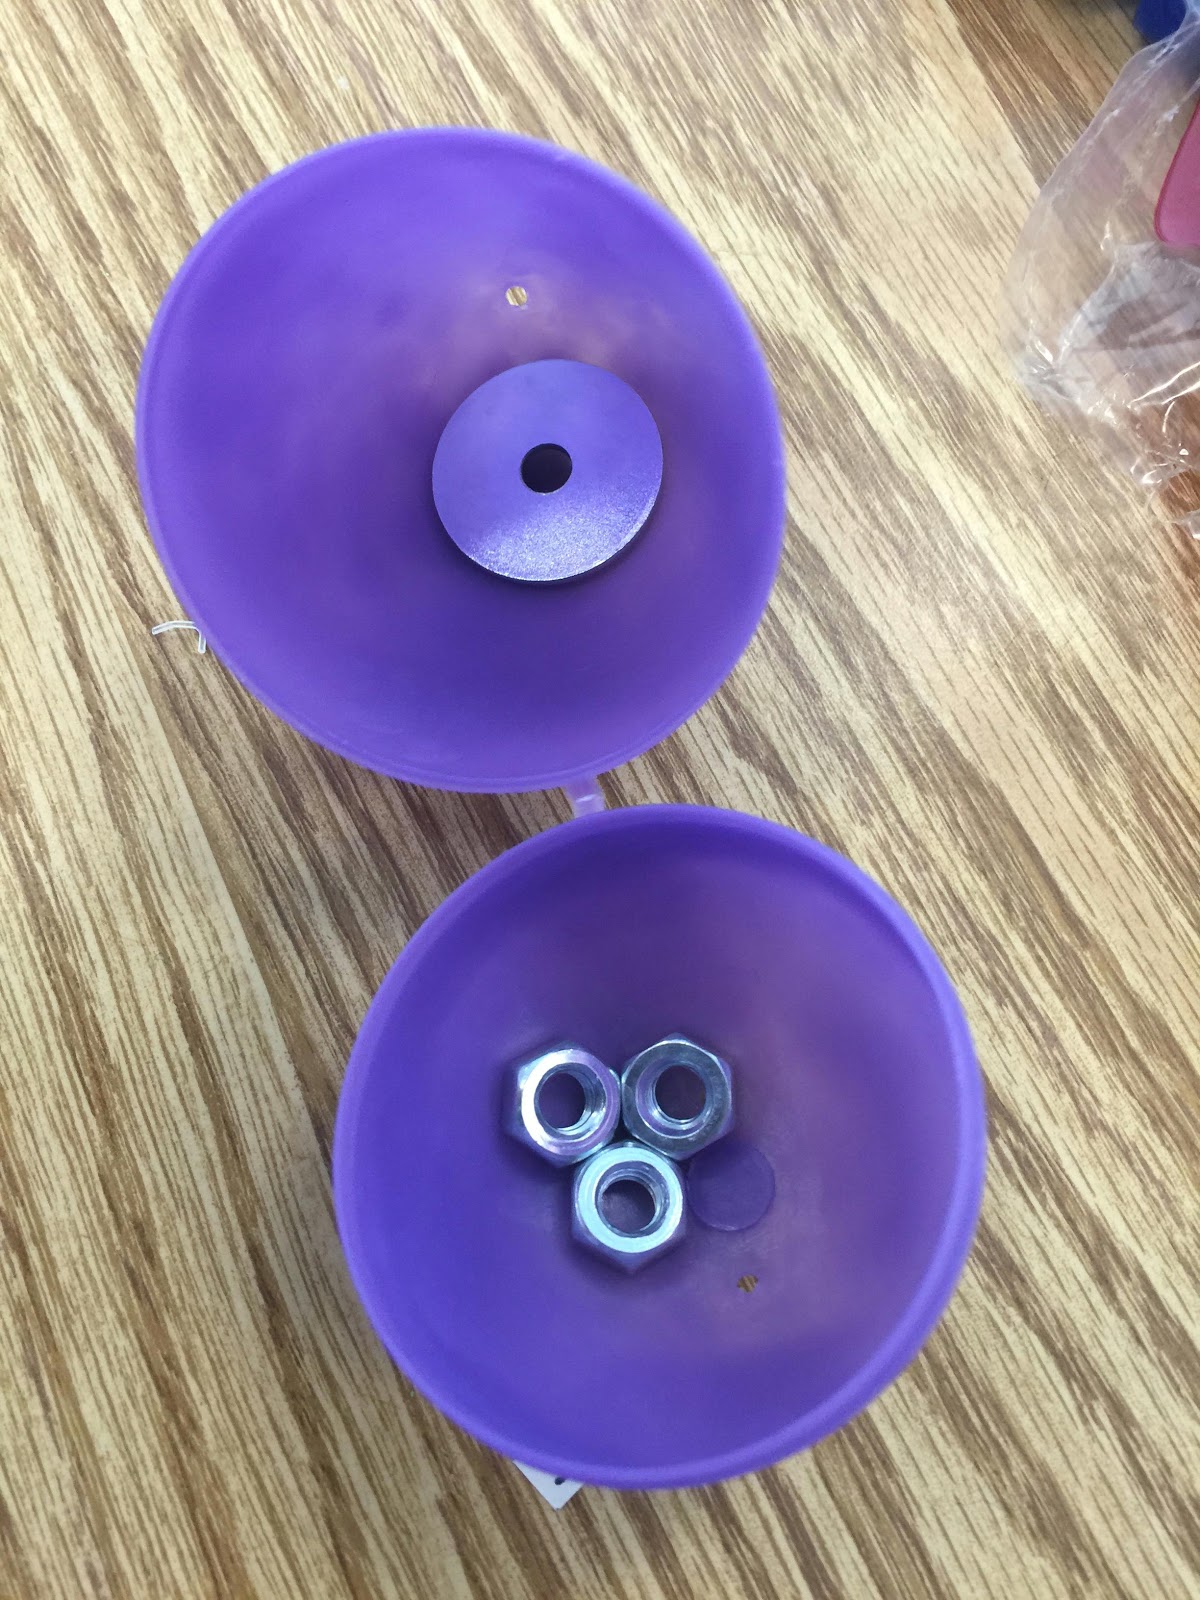
Have some sensory fun with Easter eggs this year! I ordered beeping Easter eggs and had a fun hunt with my students but I got to thinking about some of my other students that thrive with more sensory input. I bought textures, items for weightand some cellophane to make these fun eggs. My students loved them!  I made sure to leave little tabs on certain eggs like the ones with cellophane so that my students could flick the ends as well. There are so many options!  I also made a few matching eggs so that we could later do a match game. It was also fun to think outside of the box and use other items such as rubber bands to create interesting texture. It was a hit! You can easily use good old standbys like rice and beans to fill eggs. I also used nuts and washers from the tool section for weight. Bells are always fun, too! All of my students really liked making them and it nicely includes my more severe students. Happy Easter!!
Sensory Easter Eggs
different textures that allow blind kids to have a variety of sensory Easter eggs
Sensory Easter eggs
lots of sensory ideas inside the Easter eggs
Easter eggs for kids with Cortical Vision Impairment

Thursday, March 3, 2016

Accessible Eric Carle DIY

How many of you have read "Brown Bear, Brown Bear, What Do You See?" It is easily a classroom and family favorite. I have seen a few really nice accessible books for our kids to read this beloved series. I was recently hanging out in one of our preschool classrooms and saw how one teacher, Catherine D., made accessible copies for each of her students to read. These DIY is easy. You need the textured materials (feathers, cotton balls, etc), tracing paper, print out of the story and Braille labels. Catherine has allowed me to share the entire book.


How did they get the animals cut out so perfectly? Use tracing paper and then copy over to your textured paper. She then bound each copy so that students had their own copies. I am a big supporter of multiple copies of textured times because it is so helpful when you have multiple students that need it.


Remember that when you are making textured books to focus on the main concept of the picture for texture. Look at the blue bird and the teacher pages. The focus of each picture is simple, blue feathers or the eyes of the teacher. No need to go crazy with your textures!


 Another thing to keep in mind is to keep the print location constant. This will help students anticipate where the print is located.

The last page of this accessible version is the part where the book asks the student, "who do you see?" There is a 'mirror' there with a picture of the student.